Syncing Home Assistant States to Exist.io

Recently, I dove head-first into a new hobby - the world of quantified self. If you haven't heard this phrase before, it's a really simple idea - track everything.
Steps, sleep, health, productivity, music listened to, food eaten. You name it.
The attraction was clear - like any good engineer, I wanted to see if I could optimize my life with a little data and some well-placed automation. How to Measure Anything, taken to the max.
Of course, tracking is only half the battle.
I wanted to figure out why certain patterns emerged: did late-night work affect my sleep? Did productivity take a hit when I had fast food the day before?
I started searching for a tool that could help me bring all these pieces together—something that would do more than just count steps or track hours. And that’s when I found Exist.io, a service that promised to make sense of all this data.
Exist.io connects to all kinds of apps for fitness, sleep, weather, even productivity, giving you an overview of how these daily factors stack up and interact.
Perfect, right? Well, almost.
Because once I started tracking, I realized there were still things I wanted to log that Exist didn’t support out of the box. The most pressing issue was that I was already gathering a bunch of data in Home Assistant - I wanted to use this data to enrich every insight I could get. But alas, there is no native Home Assistant integration in Exist.io.
The good news - they have an API, built for cases just like this one. With a little tweaking, I could create custom integrations to add my own data to Exist—bridging the gap and making sure every data I can find in Home Assistant can also be tracked on Exist.
Since I couldn't find any walkthrough of how to do this sync online, I figured I'd share my system for anyone interested in doing something similar.
For this example, we're going to be tracking how much 3D printing I've been doing each day, using the Bambu HA integration.
Exist API Overview
Before we dive into syncing data, let’s get familiar with the Exist.io API basics, as these will be key for integrating Home Assistant with Exist.
Exist.io revolves around attributes—metrics like steps, sleep hours, or, in our case, custom stats.
Attributes in Exist are tracked daily, which means it’s designed for summarizing data by day rather than capturing every minute change.
Key Concepts
- Attributes: These are the fundamental data points tracked in Exist.io. Each attribute has:
- Name: A simple identifier like steps or dailyprinttime (used in API requests).
- Label: A user-friendly title displayed in Exist, like “Daily Print Time.”
- Group: Exist organizes attributes into broad categories like Productivity, Sleep, or Weather.
- Value Type: Exist supports various data types for attributes, including integers, floats, strings, and durations (typically measured in minutes).
- Custom Attributes: While Exist comes with a range of built-in attributes (e.g., sleep, workouts), you can create your own using the API.
In this example, we’ll define daily_print_time as a custom attribute to log 3D printing activity each day.
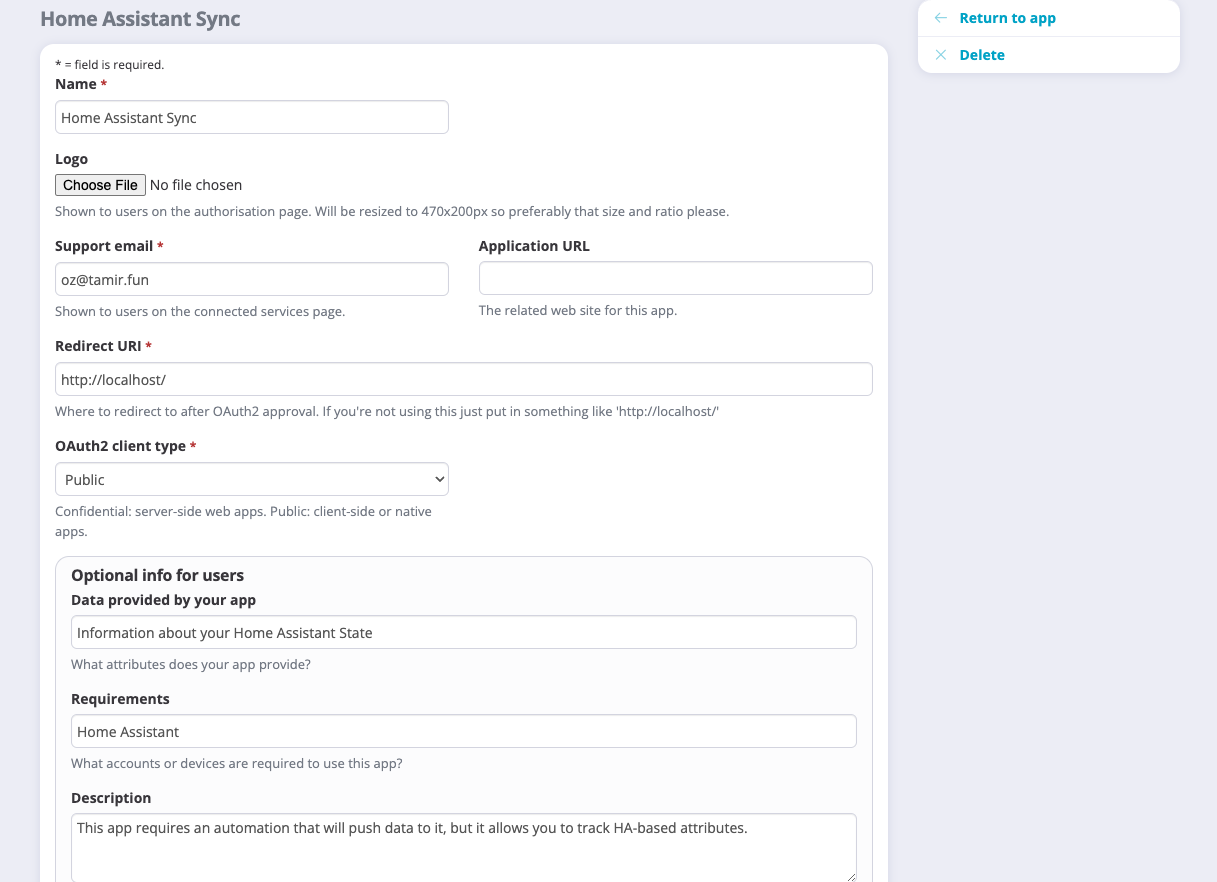
To access Exist’s API, we need to set up an OAuth2 client app. This involves creating an app on Exist.io, and using a token to authenticate Home Assistant with Exist.io:

Once the app is created, you will get an access token that will be used to authenticate the API calls done by Home Assistant.

Making Home Assistant Talk to Exist.io
With Exist’s API basics covered, it’s time to set up the commands that will let Home Assistant communicate with Exist.io. To do so, we will be using REST commands, an integration which allows HA to make HTTP calls.
To send data to Exist, we will create a different command for each operation we want to be doing - creating a new attribute, updating its value, and incrementing it by a specified amount.
Create Attribute
The first step is to create our custom attribute in Exist.io, like daily_print_time. This command only needs to be run once per attribute to set it up in your Exist account.
rest_command:
  create_exist_attribute:
  	url: "https://exist.io/api/2/attributes/create/"
    method: POST
    headers:
      Authorization: "Bearer YOUR_ACCESS_TOKEN"
      Content-Type: "application/json"
    payload: |
      [
        {
          "label": "{{ label }}",
          "group": "{{ group }}",
          "value_type": {{ value_type }},
          "manual": false
        }
      ]
In this command:
labelis the name displayed in Exist.grouporganizes the attribute under a category, like productivity.value_typedefines the data type (3 here, meaning a duration in minutes).
Update Attribute
The next REST command allows you to set a specific value for the attribute on a given day. This can be useful if you need to overwrite an existing daily value or set it manually.
rest_command:
	update_exist_attribute:
	  url: "https://exist.io/api/2/attributes/update/"
	  method: POST
	  headers:
	    Authorization: "Bearer YOUR_ACCESS_TOKEN"
	    Content-Type: "application/json"
	  payload: |
	    [
	      {
	        "name": "{{ attribute }}",
	        "value": "{{ new_state }}",
	        "date": "{{ now().strftime('%Y-%m-%d') }}"
	      }
	    ]
In this command:
namespecifies the attribute to update (in this case,daily_print_time).datesets the day the value applies to, using today’s date.valueis the new value we want to set this attribute to.
Increment Attribute
The last REST command increments the attribute value by a specified amount. This command is particularly useful for tracking cumulative stats like daily printing time.
rest_command:
	increment_exist_attribute:
	  url: "https://exist.io/api/2/attributes/increment/"
	  method: POST
	  headers:
	    Authorization: "Bearer YOUR_ACCESS_TOKEN"
	    Content-Type: "application/json"
	  payload: >
	    [
	      {
	        "name": "{{ attribute }}",
	        "value": {{ value }},
	        "date": "{{ date | default(now().strftime('%Y-%m-%d')) }}"
	      }
	    ]
Here:
nameidentifies the attribute to be incremented.valuespecifies the amount to increase the current day’s value by.datesets the day the value applies to, using today’s date.
With these commands in place, Home Assistant can now create, update, and increment Exist.io attributes directly, allowing you to push custom data from your setup into Exist.
Creating an Attribute
With the REST commands set up, the next step is to create the custom attribute in Exist.io.
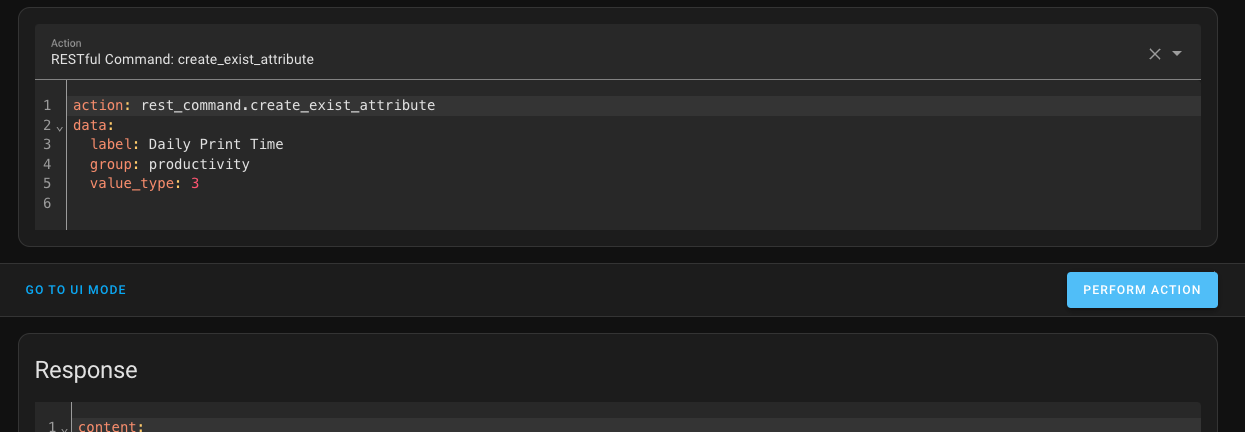
This is the one-time setup that registers our attribute—daily print time—in your Exist account. This can be done either using an automation, or using the Home Assistant developer tools. Since this is a tutorial, let's go with the latter:
- Open Developer Tools in Home Assistant and go to the Actions tab.
- Under Action, select
rest_command.create_exist_attribute. - Hit Perform Action to execute the command, creating the attribute in Exist.io.

Based on the response, you can tell if the attribute was successfully created, Once it is, we can go ahead and create an automation to log 3D printing time in Exist.
Logging 3D Printing Time to Exist.io
With the daily_print_time attribute set up, we’re ready to start logging our 3D printing time.
For this, we’ll create an automation that gets called whenever a print starts, and increments the attribute in Exist.io based on how much print time is planned. This is done using the bambu_x1c_remaining_time attribute from the Bambu integration.
alias: Log 3D Printing Time to Exist.io
description: "Automatically logs 3D printing time to Exist.io as the printer runs"
trigger:
  - platform: state
    entity_id: sensor.ozs_bambu_x1c_remaining_time
    from: "0"
    to: "running"  # Adjust based on the sensor state representing a running printer
condition:
  - condition: numeric_state
    entity_id: sensor.ozs_bambu_x1c_remaining_time
    above: 0
action:
  - service: rest_command.increment_exist_attribute
    data_template:
      name: "daily_print_time"
      value: "{{ trigger.to_state.state | int }}"  # Replace with duration sensor if available
  - service: logbook.log
    data:
      name: "Exist.io Log"
      message: "Incremented print time on Exist.io by {{ trigger.to_state.state }} minutes"
mode: single
To make things debugable, we will also be logging the response into the logbook service.

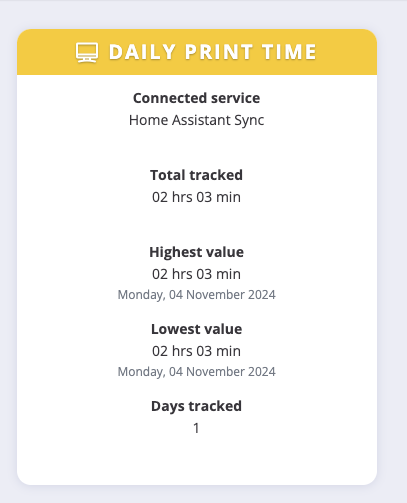
Once this automation is active, you’ll start seeing your daily 3D printing time accumulate in Exist.io.
With each print session, Home Assistant updates the daily_print_time attribute, providing you with a running total that you can view alongside other life metrics.

Conclusion
And that’s it—my 3D printing time is now tracked, quantified, and rolled into Exist.io along with my steps, sleep, and the rest of my life metrics.
It’s honestly pretty satisfying to see data from this setup nestled right next to all the other insights Exist provides.
Not to mention, it’s also a bit addictive; once you see how easy it is to pull in one data source, it’s tempting to start thinking of all the other things you could track.
Of course, Exist.io is designed for daily summaries, so you won’t be analyzing every moment your lights turn on or every change in room temperature.
But that’s fine—this integration is perfect for capturing high-level stats that build into trends over time. And if you’re like me, you’ll start finding connections you didn’t expect.
Printing projects affecting your productivity? Sleep quality tied to home energy usage? Sure, why not.
So, if you’re the kind of person who loves to track, tinker, and optimize, integrating Home Assistant with Exist.io is a solid move.
It’s a great way to pull in unique data points that really matter to you, bringing them into the bigger picture of your daily life. An remember - if it can be tracked, it can be improved. So, why not?
FIN
