Building the MDR terminal from Severance

Like a lot of folks, I recently got hooked on Severance. This wasn’t my first time hearing about the show—back when Season 1 was running, people wouldn’t shut up about it. I even gave it a shot back then, watched a single episode, and decided it was way too dark for my taste.
That was a mistake.
With all the buzz leading up to Season 2, I figured I’d give it another chance. And wow—what a fantastic piece of television. I binged all the available episodes, and now I’m just sitting here, restless, waiting for the next one to drop.
Which means I needed something to do in the meantime.
See, when I get into a new piece of pop culture, I don’t just watch it—I dive in. Reading theories on Reddit, forcing my friends to watch along, the whole thing. But even that’s not enough. My brain won’t rest until I’ve made something out of it. It’s how I feel like I’m part of it. Some people buy merch—I build.
So, naturally, I decided to make my own MDR terminal.
Physical Parts
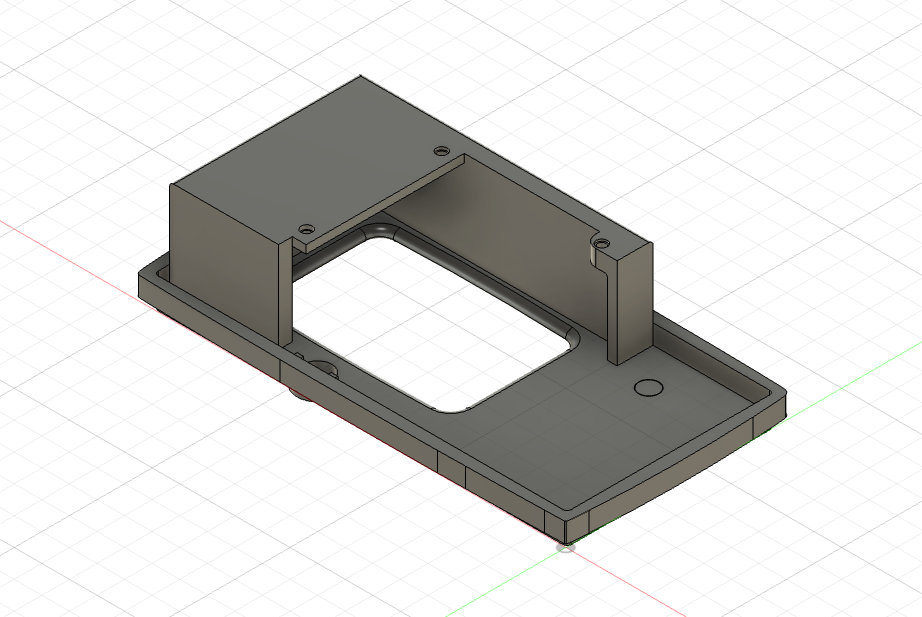
To get started, I needed to build the physical enclosure of the MDR terminal. Instead of modeling it from scratch, I used this MagSafe charger modal from @SeoulBrother - with slight modifications.
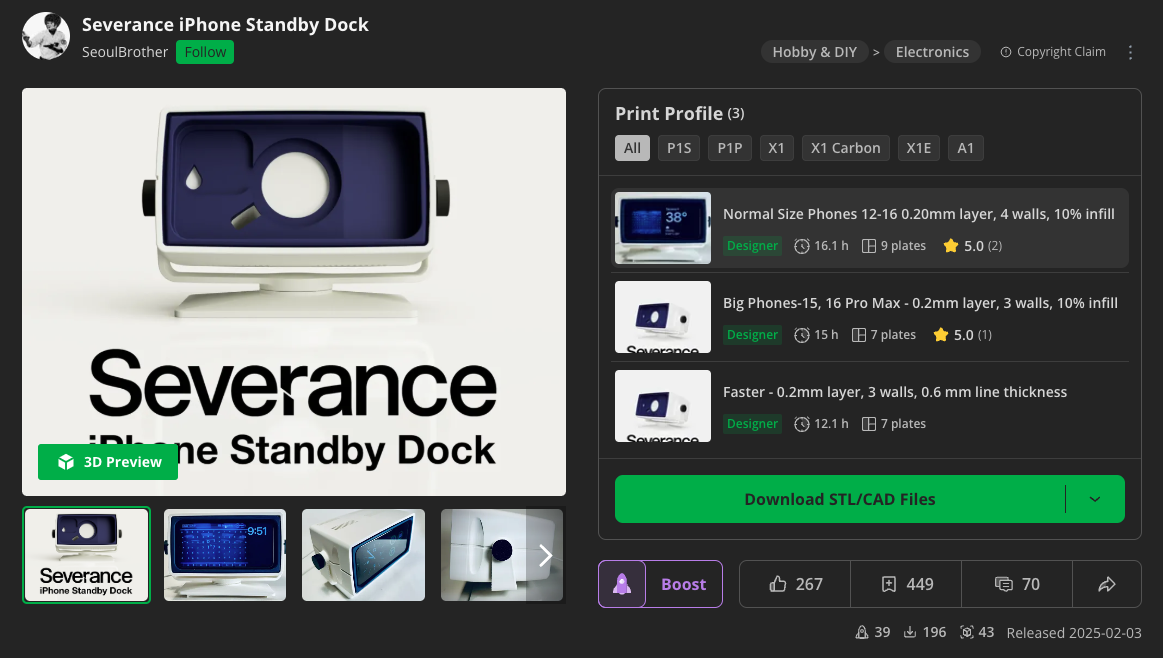
While the original modal is made to fit an iPhone and therefore is not hollow, I knew that I would need a lot of storage space for the electronics - so I used a negative cube to carve out a big chunk of the case. I will not upload this modified part to avoid breaking the license on the original upload - but here is how it looks like in my slicer. YMMY though.

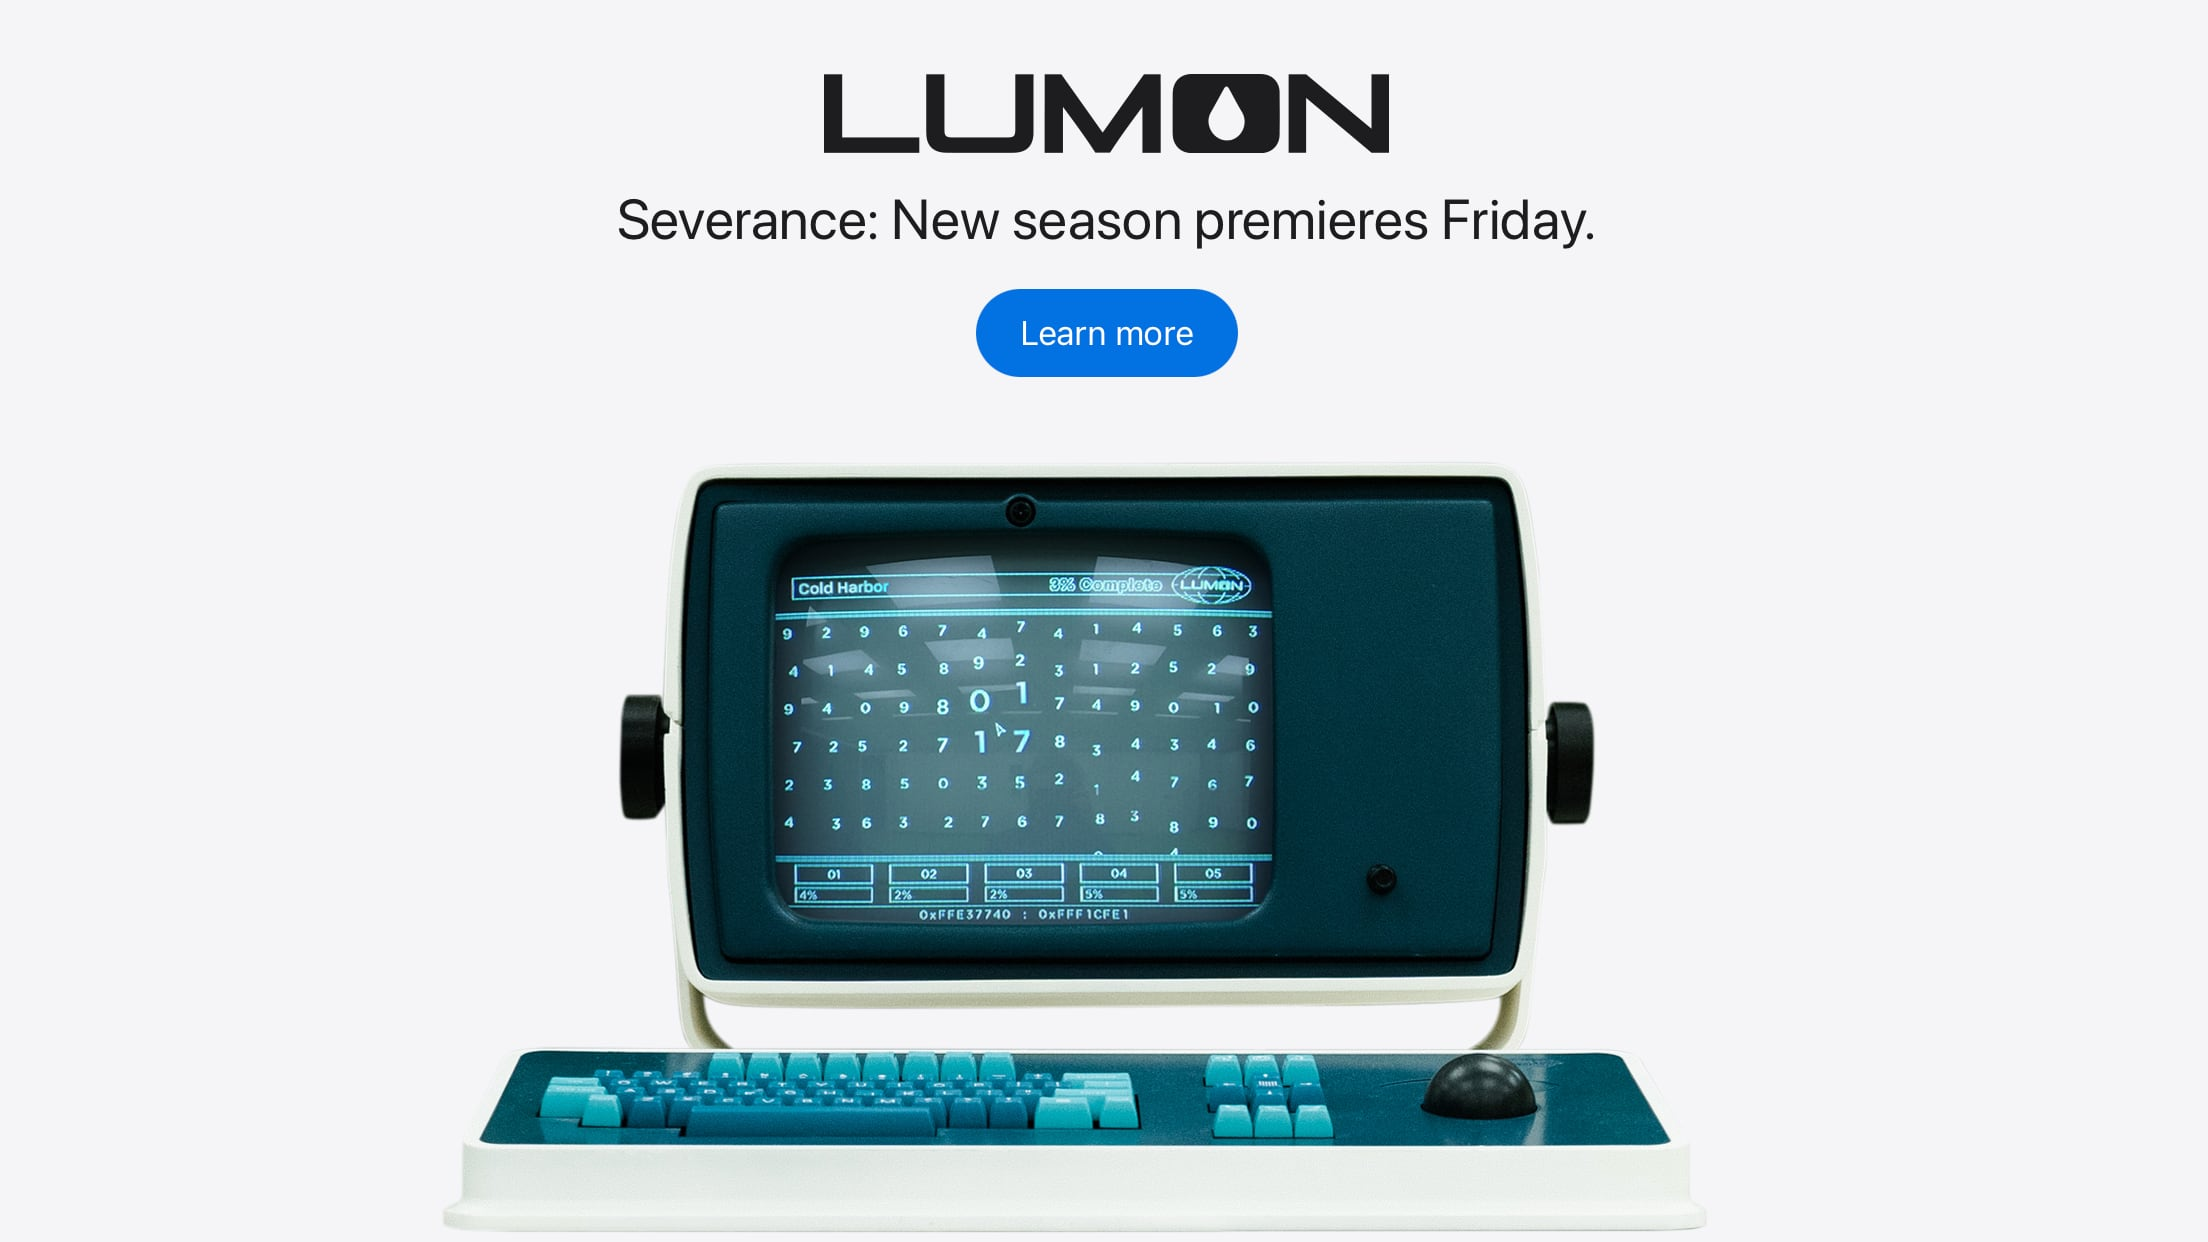
Next, I needed to recreate the front-facing part of the enclosure. To do so, I looked up promotional images from the series - luckily for me, Apple had run a marketing campaign for the show which included an Apple-like product page for Lemon's stuff. This gave me this great reference image:
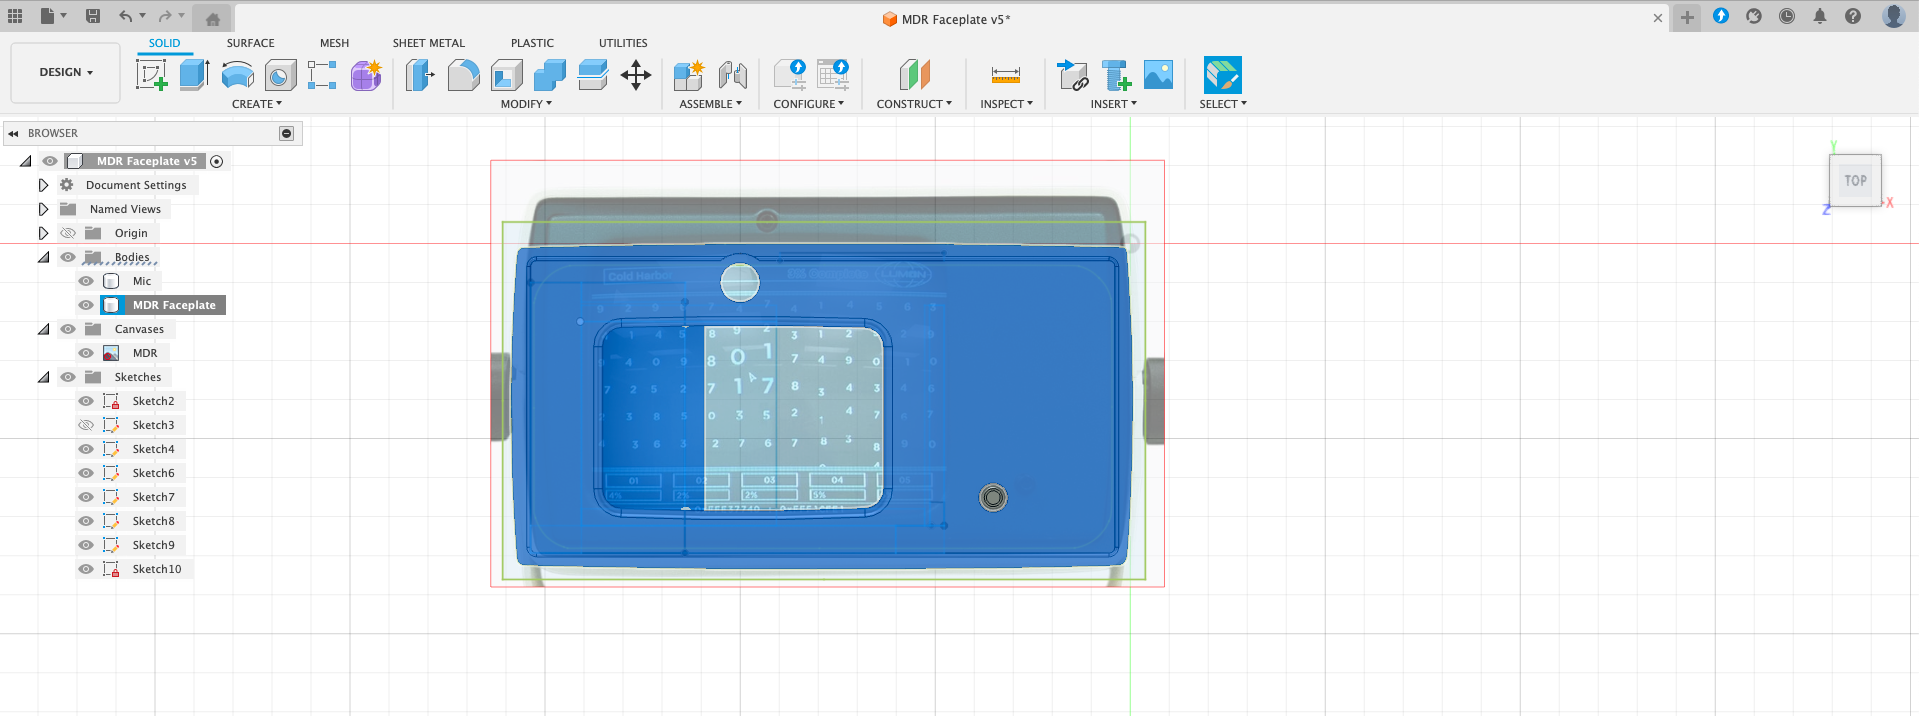
Based on this reference, I fired up Fusion 360 and started modeling. Usually, when modeling off a reference image, I'll start from tracing the features of the image - this time, I started with the screen dimensions and traced based on the enclosure size I already had - which is why the proportions are a bit off.
Of the flip side (literally...), I modeled a holder for the combined unit of the Raspberry Pi + screen:
One of the biggest reasons I am a strong believer in 3D printing is just how easy this manufacturing process is, and how this enables lighting fast iterations - within the two evenings I spent on this project, I went through quite a few iterations.
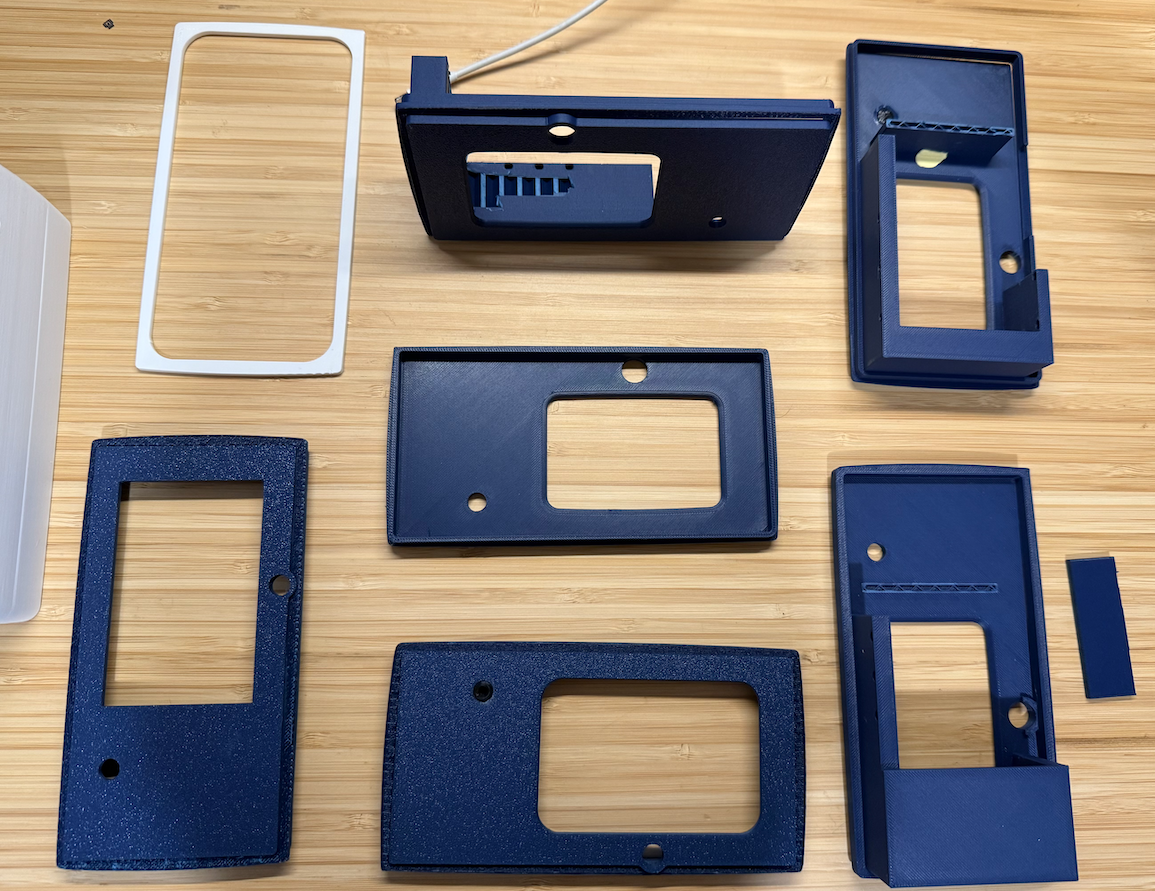
One of the biggest issues I had was making sure that the Pi stays in place and is not pushed back. After trying multiple approaches, I ended up with placing overhangs above the unit and adding holes for fixing it in place with nuts and bolts.
For anyone interested in building this themselves - the final modal (and the Fusion project file!) is available for download here.
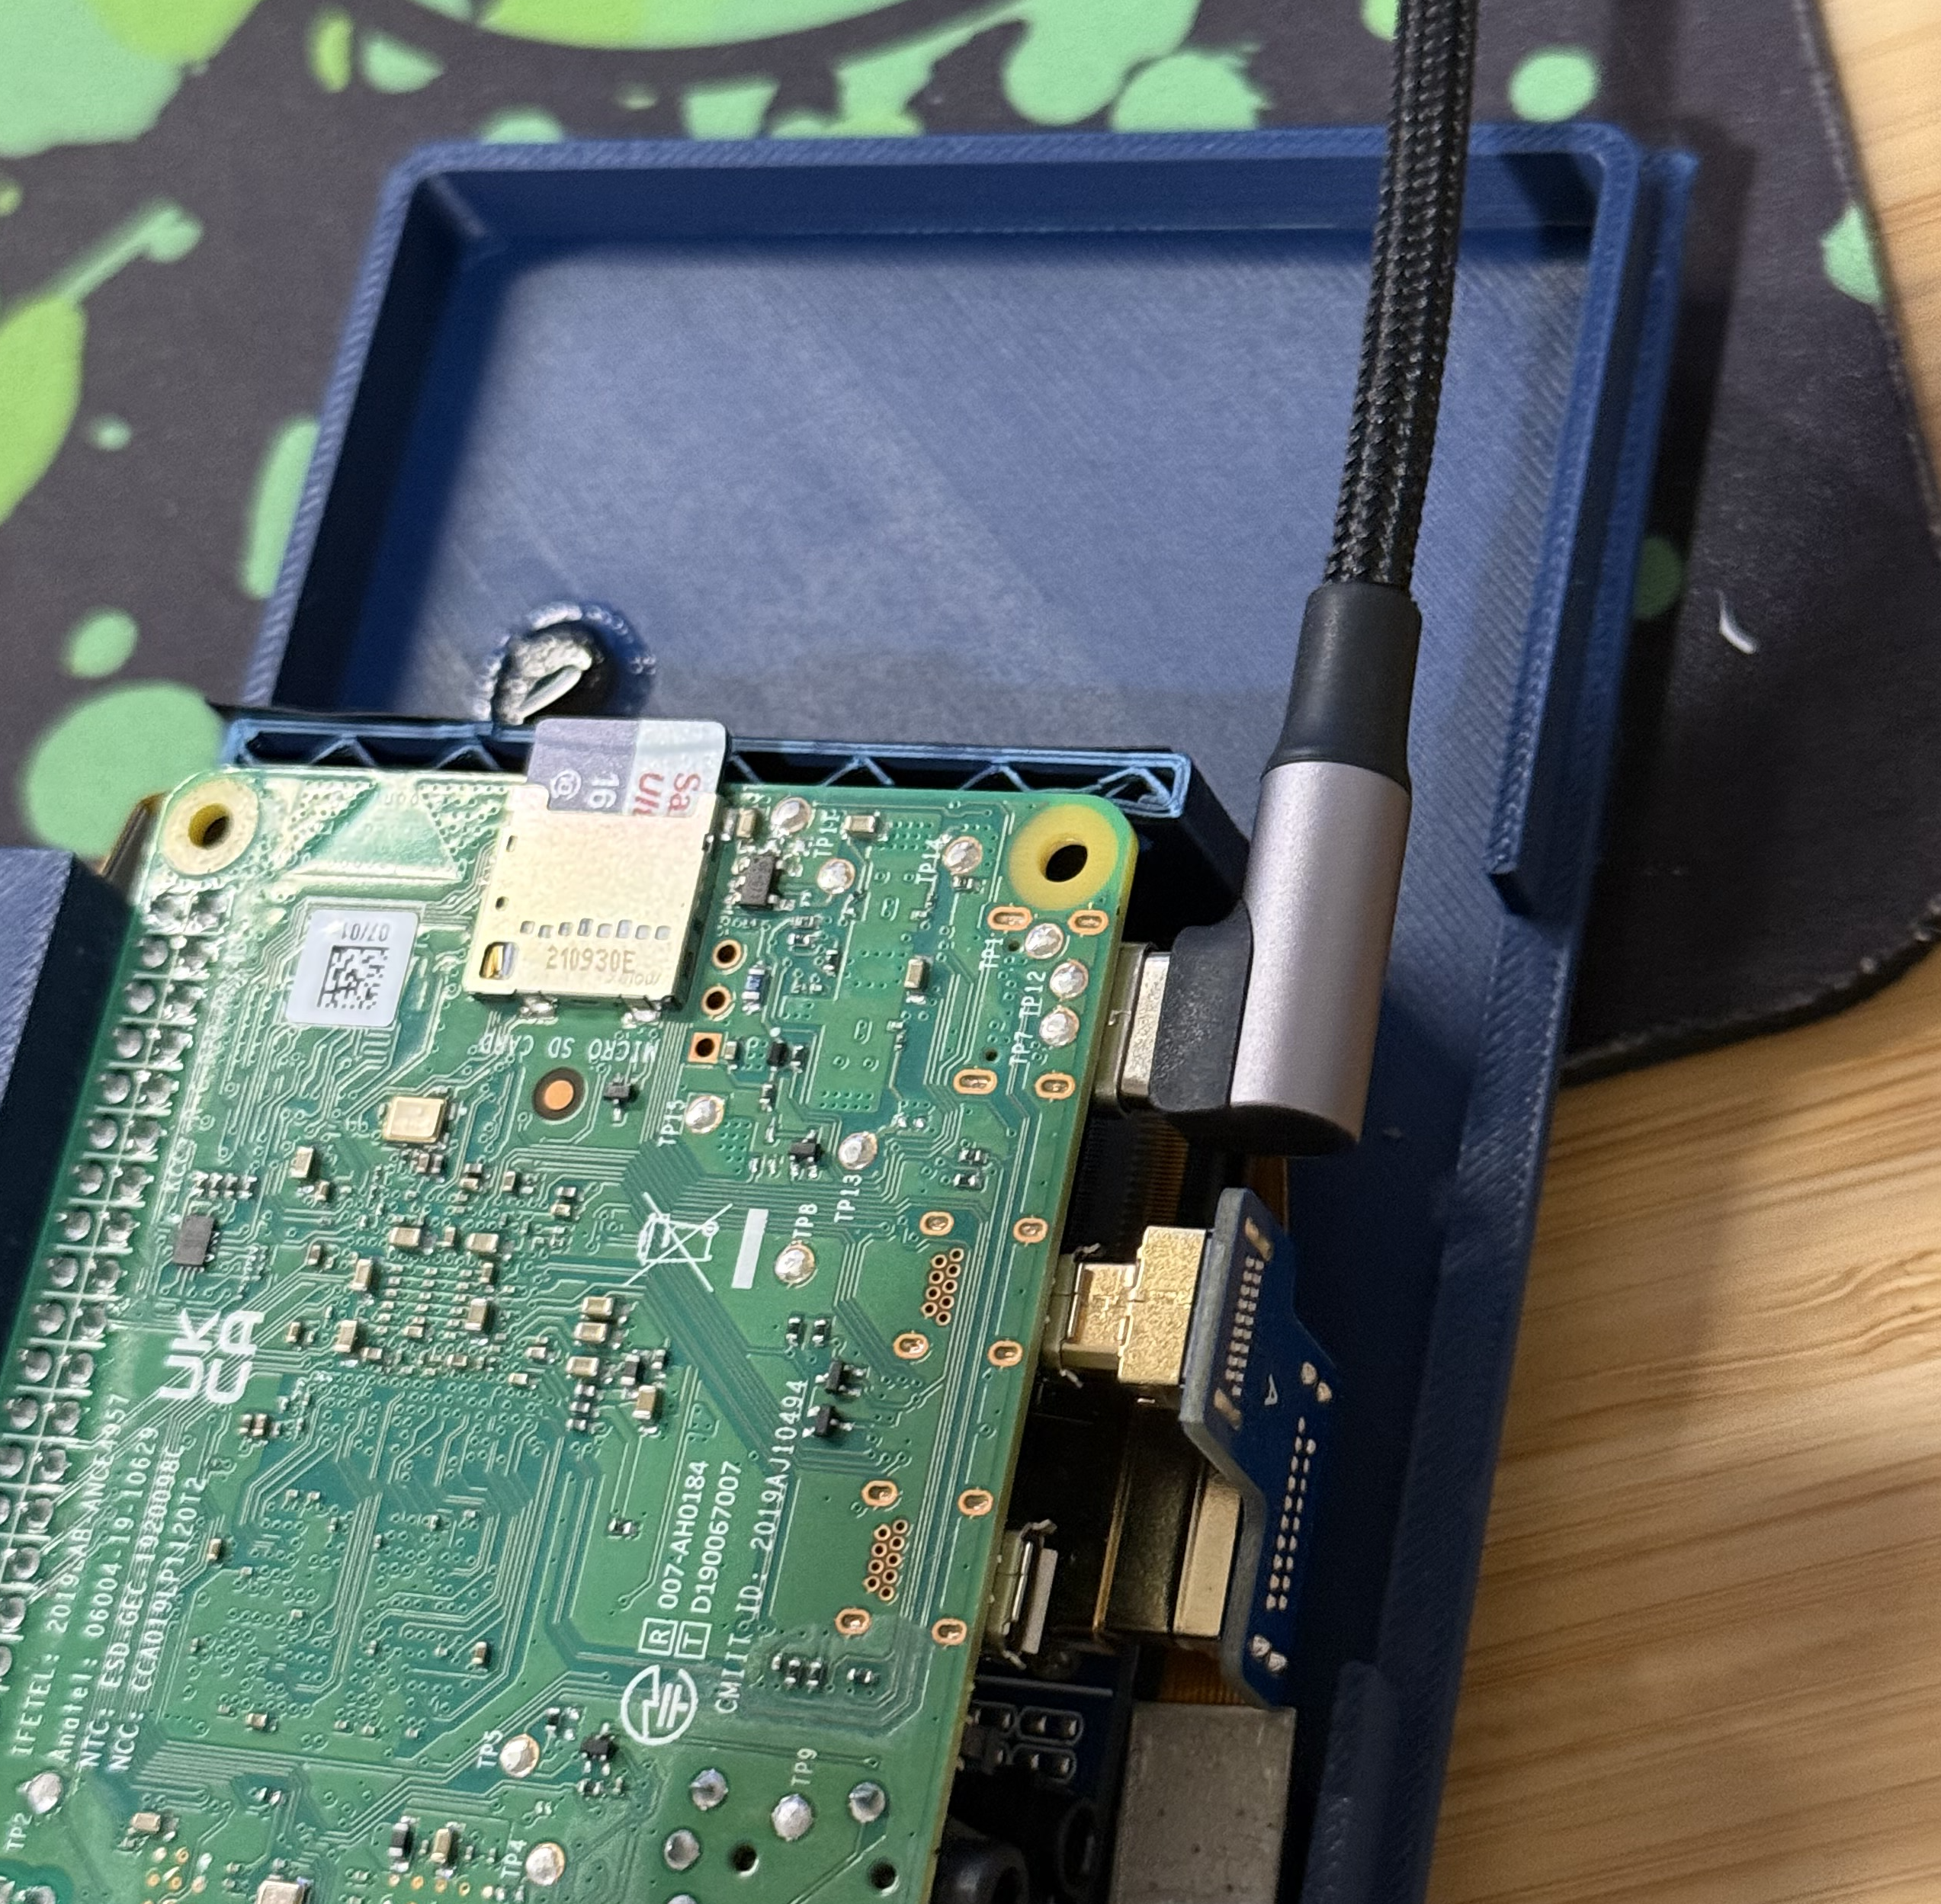
Another issue I faced was the tight space for cables. If you've ever worked on a hobby project that was tight in space, you probably noticed the same thing as I did in this one - cables are f**king huge. The connector for USB-C? Giant! Where am I supposed to find a place for this?
No. Instead, I went ahead and got an angled cable, which is apparently a thing. I was very happy to discover that this is a solved problem, because I was inches away from splicing the cable and trying to make this on my own.
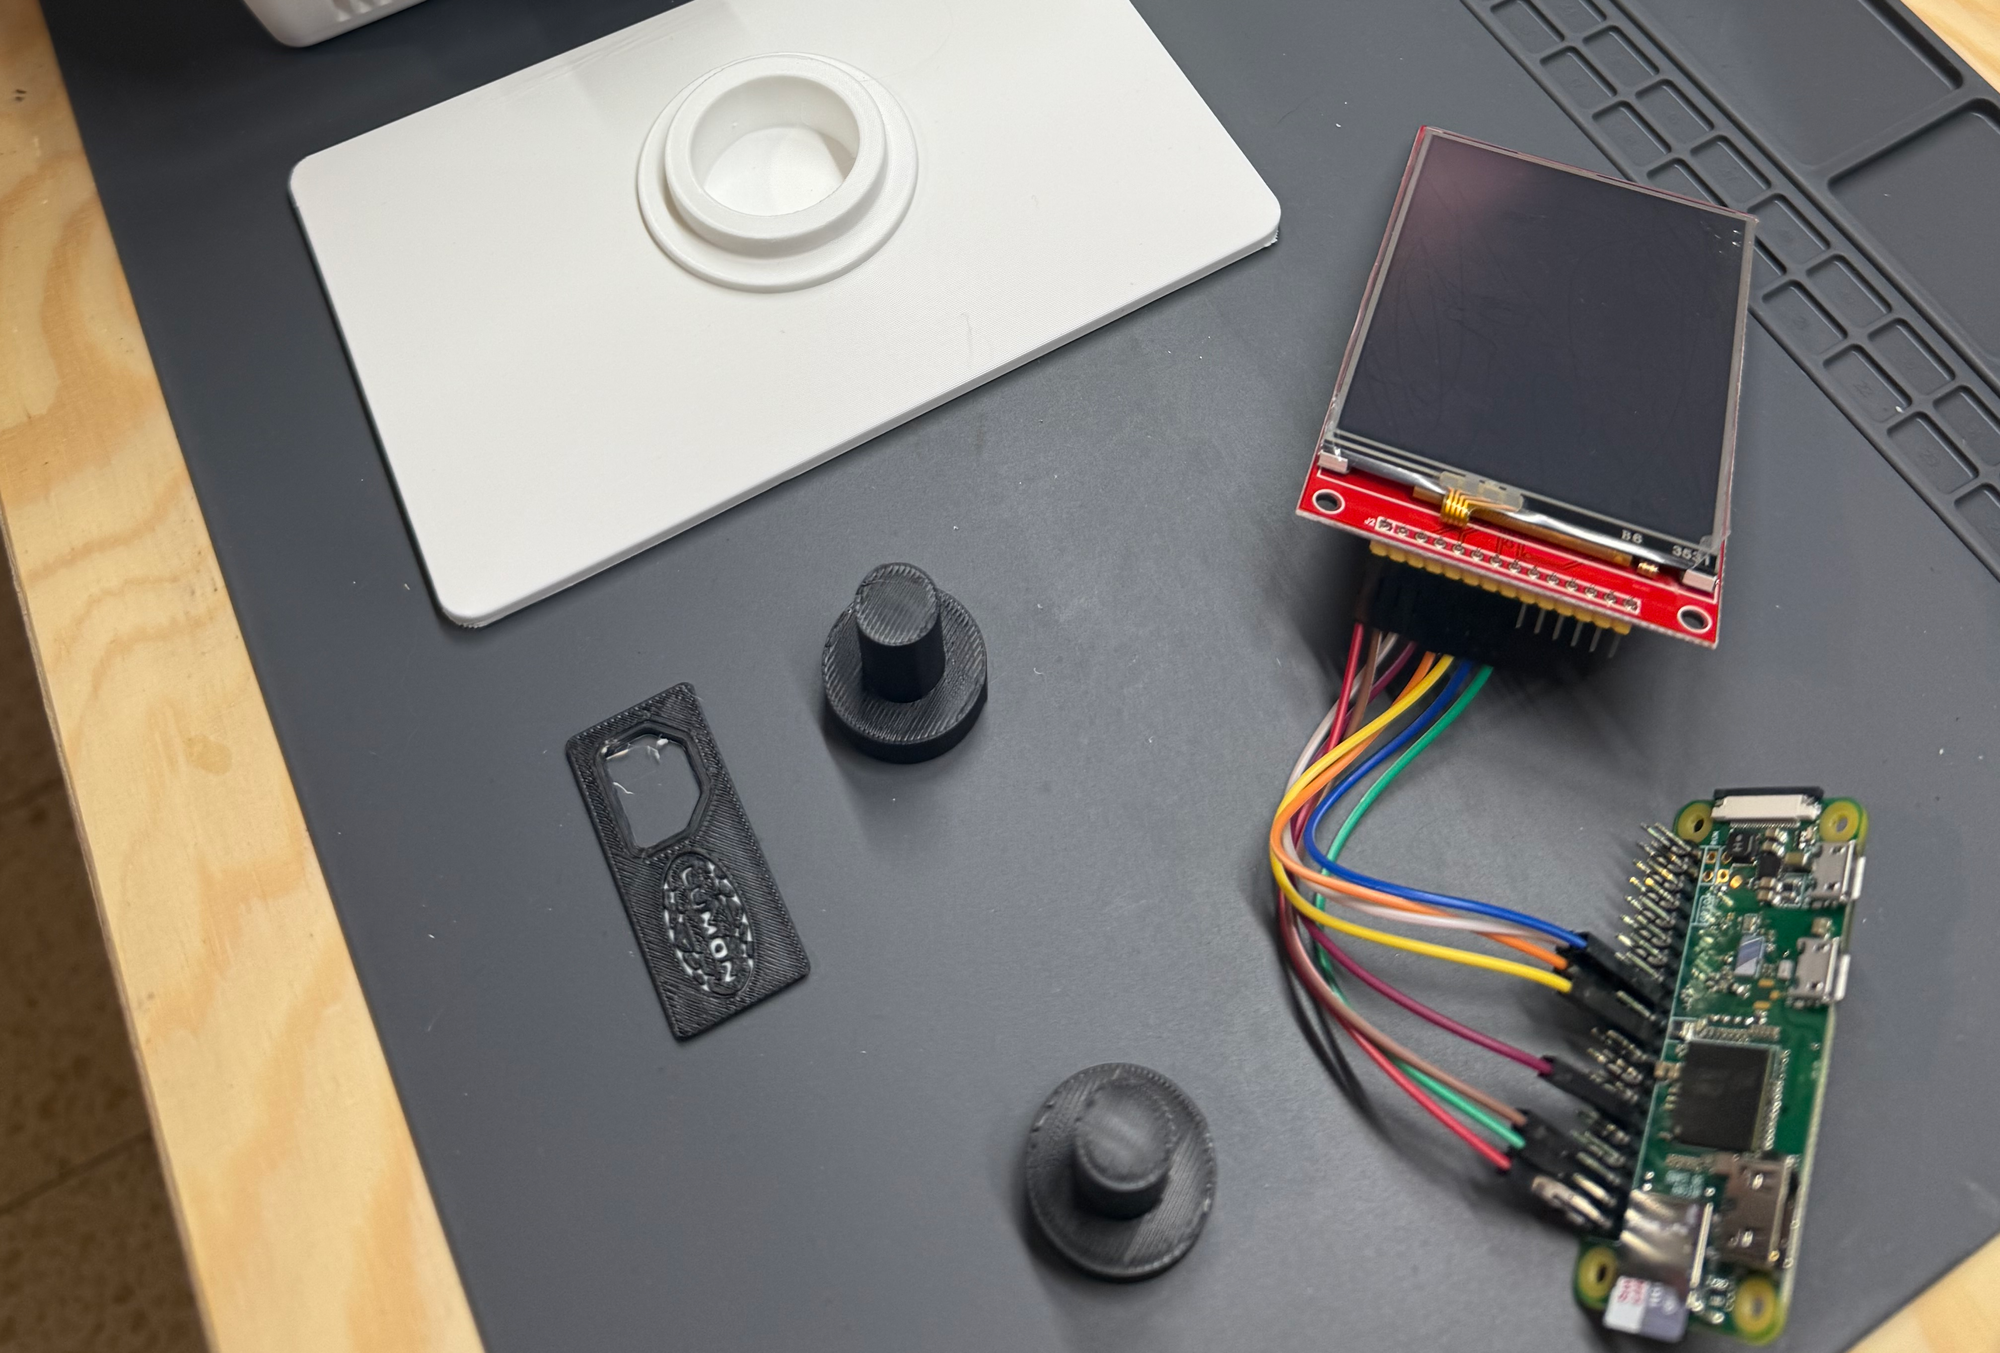
As a final touch, I added a small Pi-connected camera that I got a while back, accidentally broke, and never used again.
Electronics and Software
Right from the outset, It was clear to me that this is the type of project where I am better off with a Raspberry Pi rather than trying to use an Arduino or ESP platform - I know that I'll need to run some heavy graphics, and I didn't want to be strapped for resources.
Due to the small space constraints, I opted for a Raspberry Pi Zero - the small form factor made sense to me, and I thought that while the graphics are probably a lot for an ESP, the Zero should be able to handle the load. Using a full-form Pi seemed wasteful.
For the screen, I pulled an old touch display I had laying around for years. This display uses SPI for communications, and it seemed like a good fit. I connected the two, and started working on the software side of things.
However, after some tinkering around, It turned out that both of these decisions were ill guided. The display, which is based on a driver called IL9488, turned out to be very badly supported - the required drivers were removed from the Pi main kernel back in 2015. While there are a couple of projects that claim to solve this by providing their own drivers, after compiling a few It was clear that this avenue will be more hassle than reward - which is why I decided to drop it and just get a Waveshare LCD screen instead.
However, this screen was now using HDMI instead of SPI. While, again, it looked like it is possible to run this on a Zero using SPI, I did not want to invest any more time on this - so I just switched over to a Pi 4, which played nicely and was supported by the provided HDMI to Mini HDMI dongle.
At the end of the day, I think this switch was the right call - it went from being a shit show to "just work". Since time is money, I am quite happy with this trade.

Software
Since I was using a Raspberry Pi, I figured that most of the software is already out there - and I was right. A quick search brought me to the Github repository for FullPageOS - a Raspbian fork customized to support kiosk mode, where you boot the device and it automatically loads up a web browser pointed to a website of your choosing.
For the actual MDR software, I used this project by the fake Lumons Industries Github page. This project is actually, and uncharacteristically, just raw Javascript - which meant that I didn't need to play around with any fancy building solutions to run this on the Pi.
To get it running, I simply created a small nginx server and pointed the FullPageOS config to the server. First, I needed to turn off the existing HTTP server that ships with the distro:
sudo systemctl stop lighttpd
sudo systemctl disable lighttpd
Then, I installed ngnix and cloned the repo:
sudo apt update
sudo apt install nginx -y

git clone https://github.com/Lumon-Industries/Macrodata-Refinement mdr
Once I had everything I needed, I edited the ngnix config (/etc/nginx/sites-available/default) to serve the project files:
server {
    listen 80;
    server_name _;

    root /home/pi/mdr;
    index index.html;

    location / {
        try_files $uri $uri/ =404;
    }
}
Finally, I made sure that the server is running with the new configuration:
sudo systemctl restart nginx
sudo systemctl enable nginx
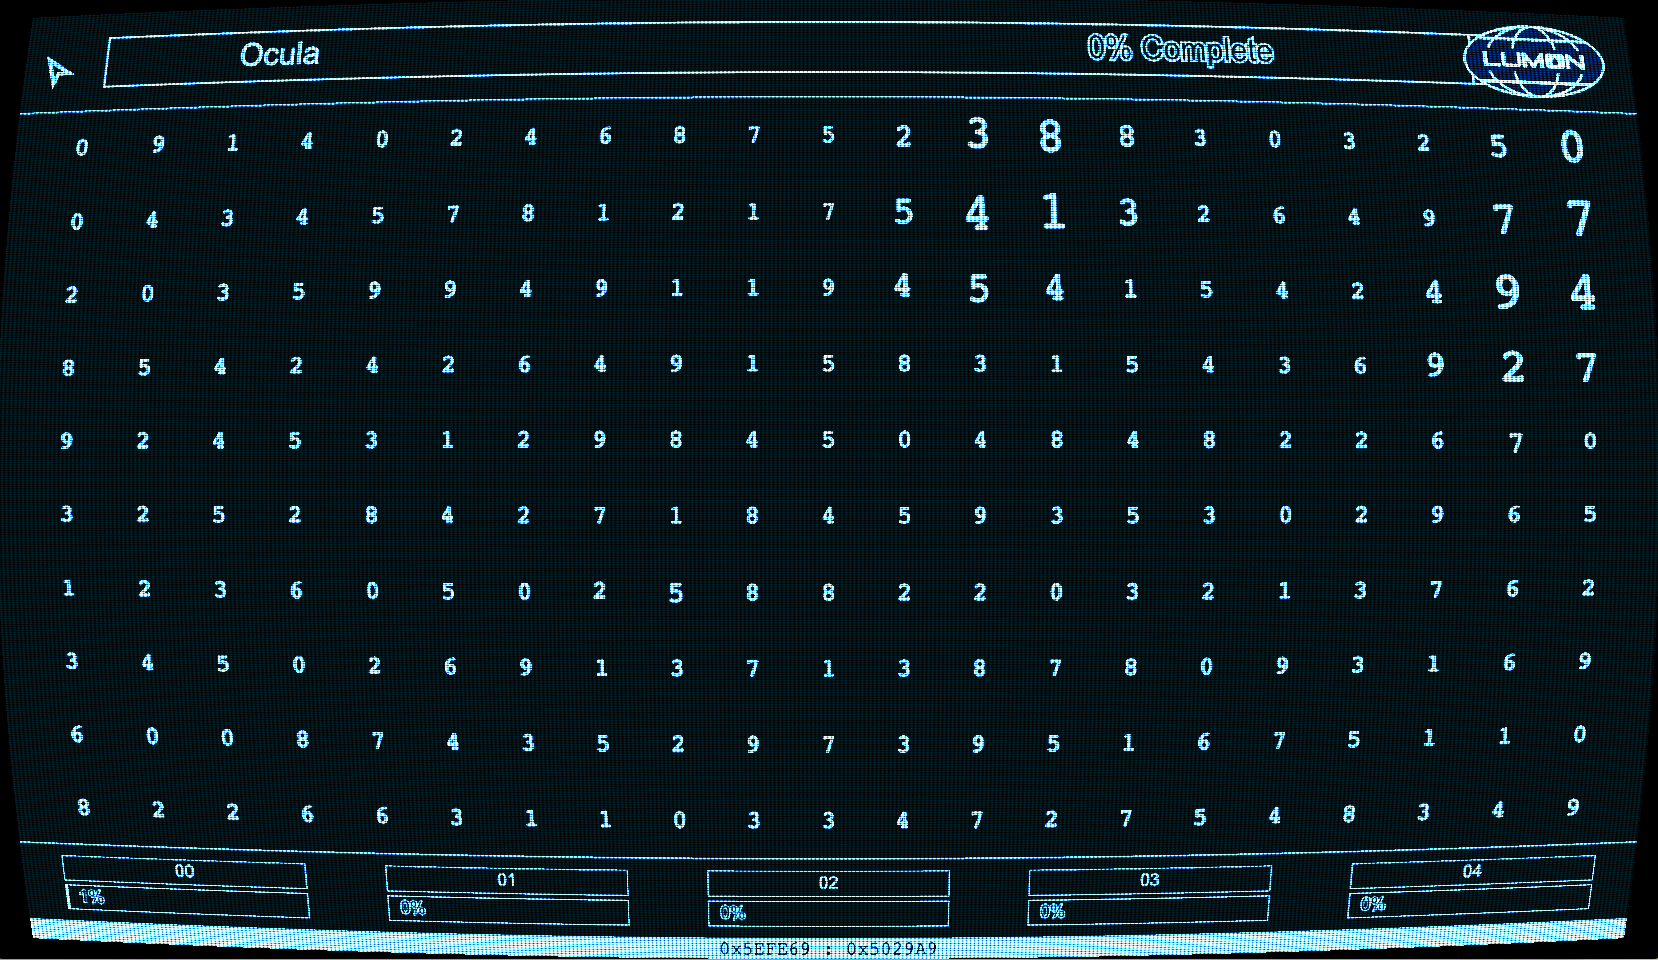
And indeed, serving to the Pi's IP address gave me the MDR interface:
The only missing piece was to set the FullPageOS configuration to point to the site. To edit the URL loaded on boot, all needed is to edit a simple file:
rm /boot/firmware/fullpageos.txt
echo 'http://localhost/' > /boot/firmware/fullpageos.txt
Final Result
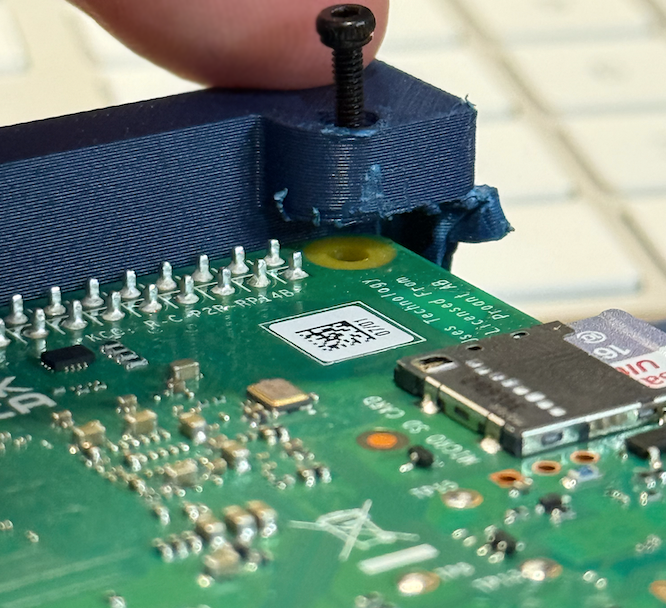
Once all the printed parts, the electronics, and the software were all ready, it was time to put it all together. This took some back and forth, especially around getting the electronics to fit in the case.
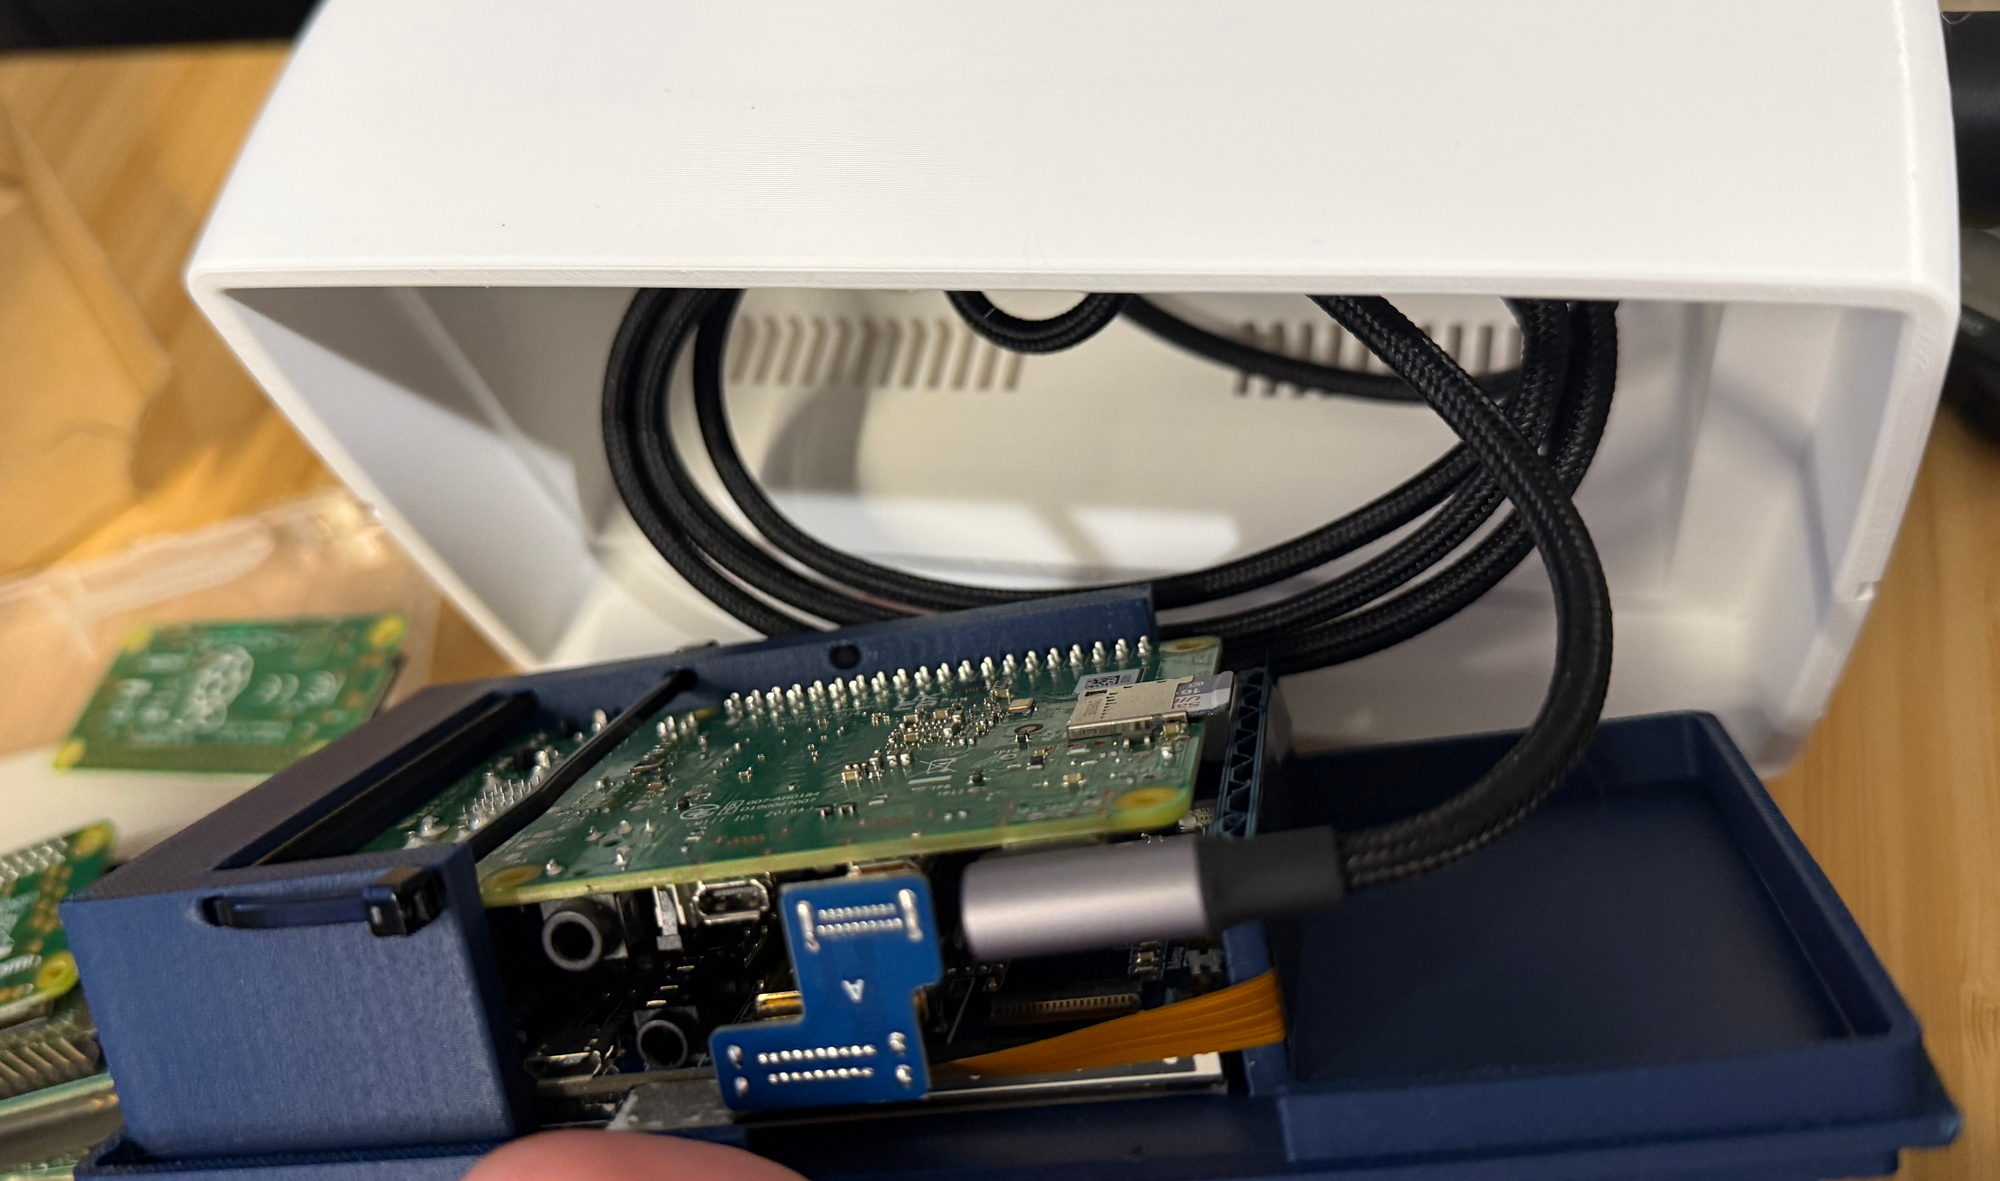
In fact, I ended up having to break a tiny bit of the printed part to fit it in. While I fixed it in the final modal I published, I didn't want to reprint - which is why the resulting terminal is using a broken part (as you can see in the "bolt" image above).
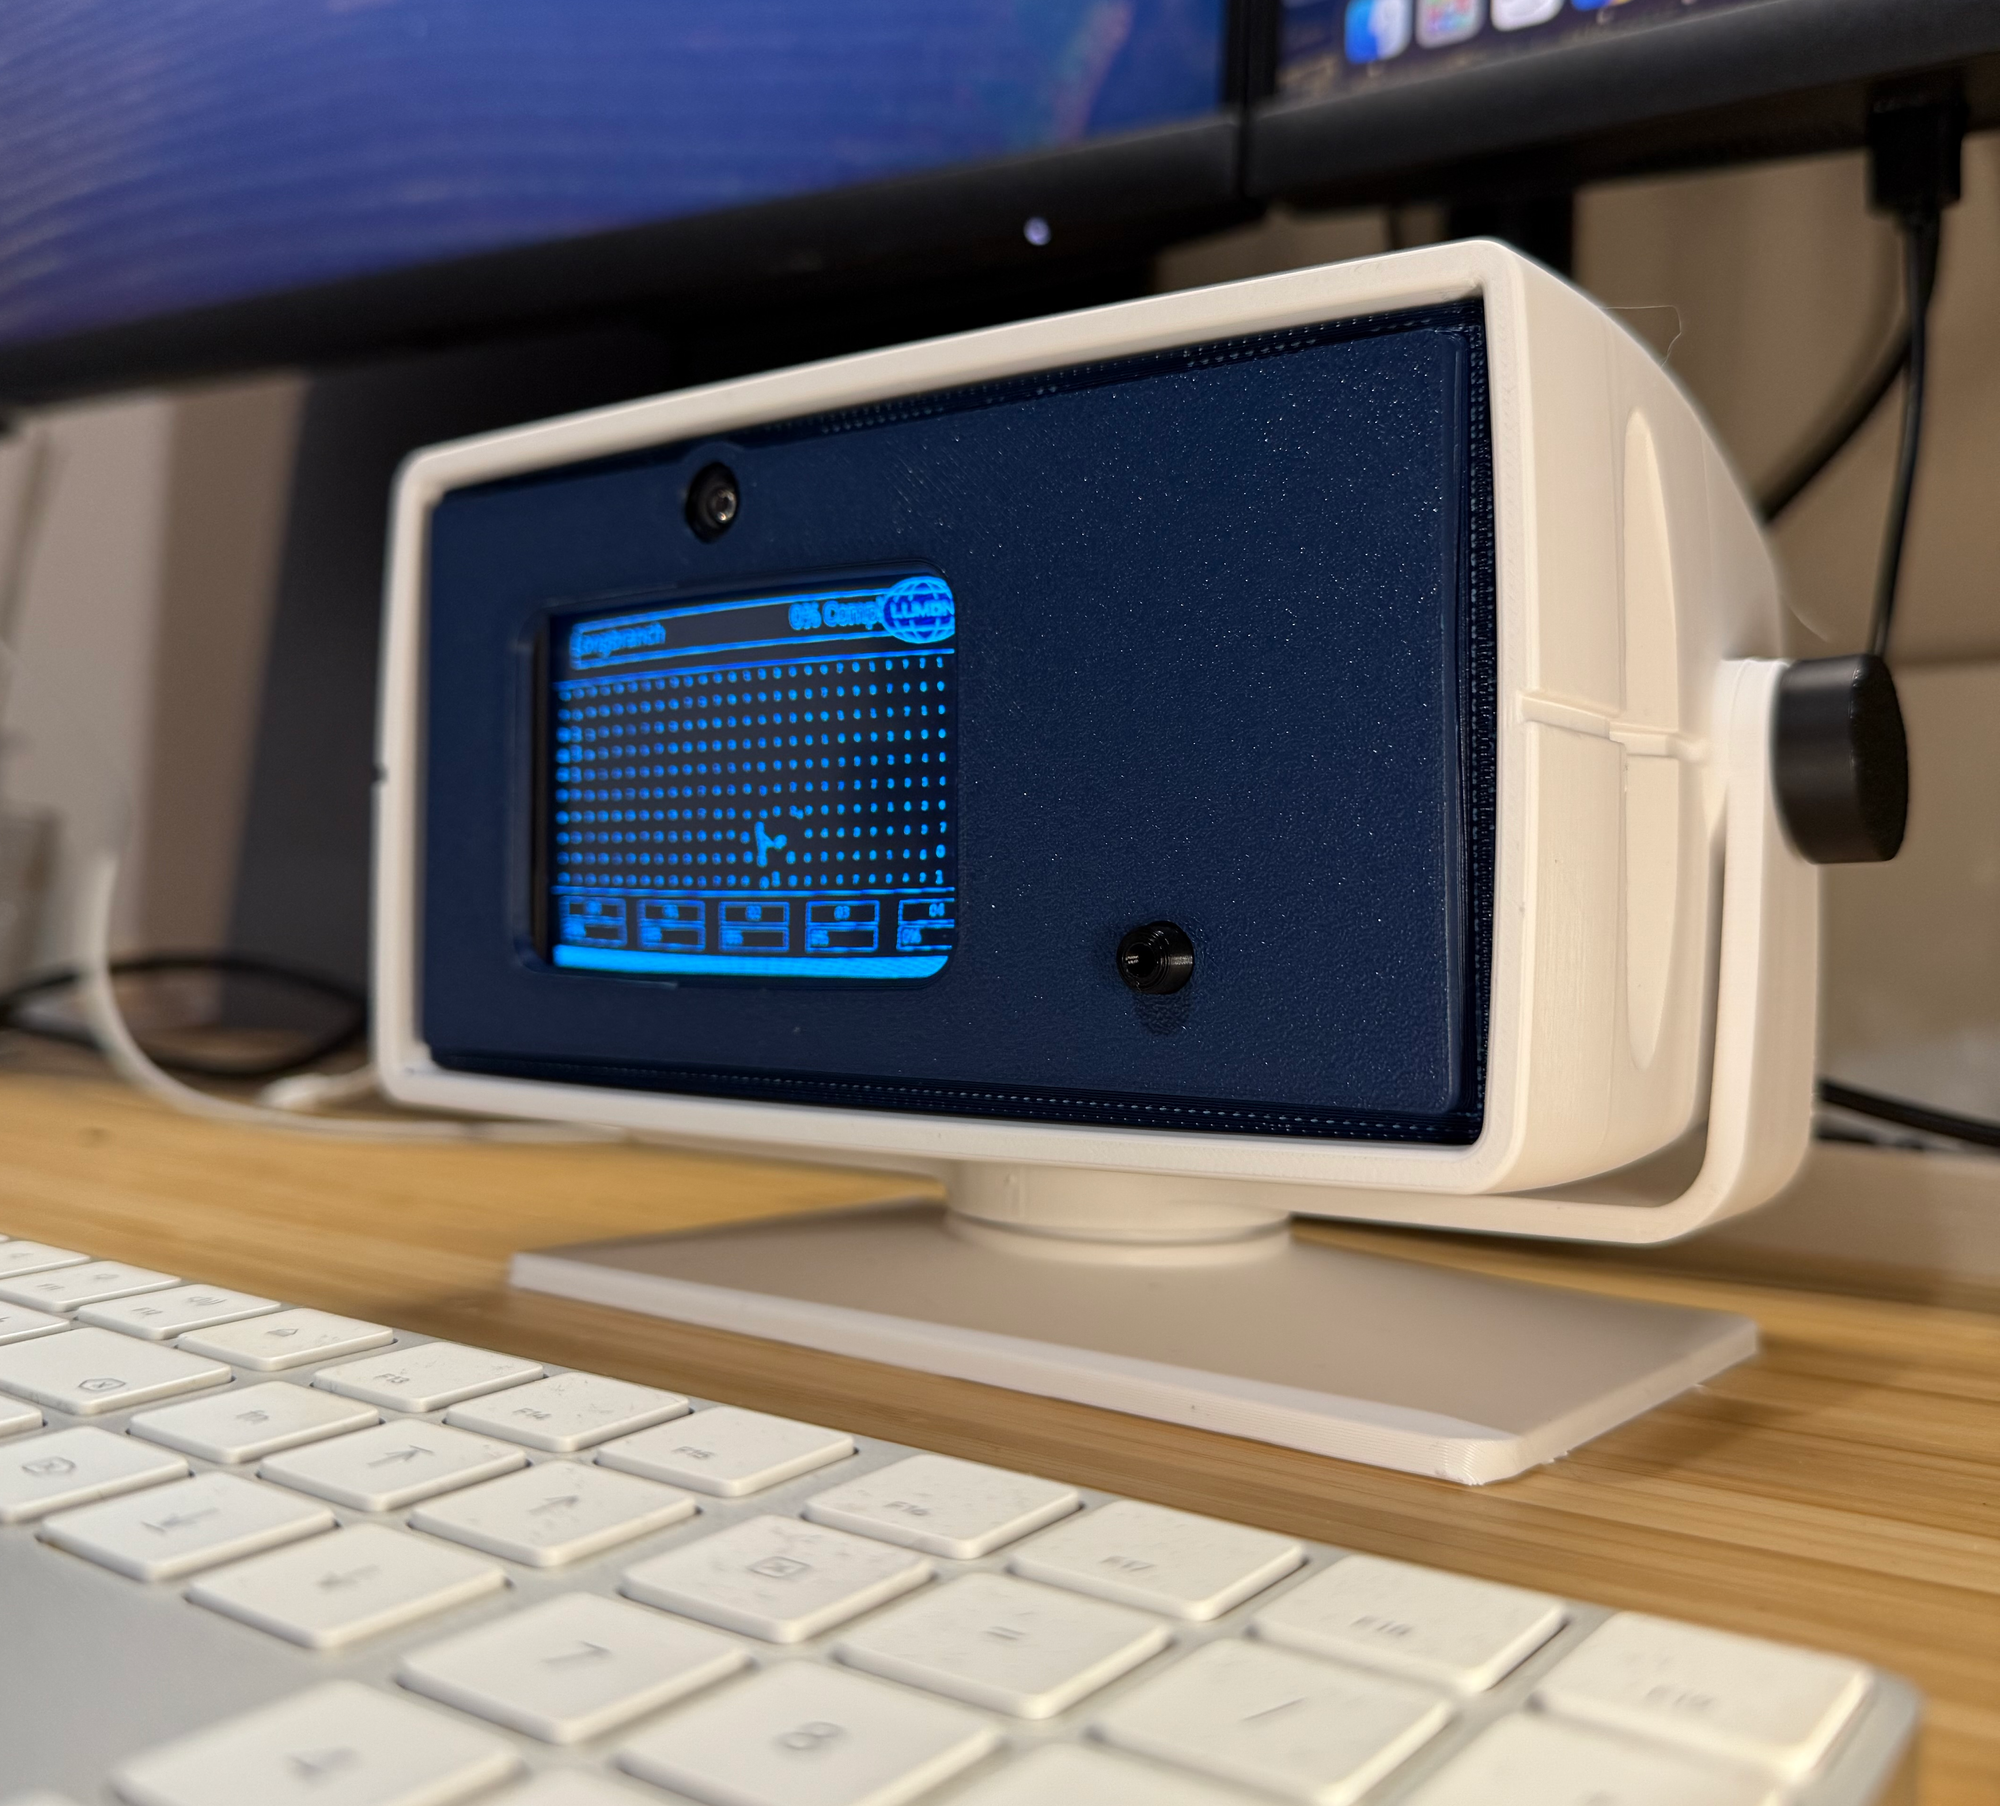
However, it was all worth it. Because the final result is stunning.

Conclusion
I have to say, looking at my completed MDR terminal sitting on my desk, I feel… oddly proud?
It’s weird to put this much effort into recreating a computer designed for soul-crushing corporate monotony, but here we are.
When I told some friends that I was working on this project, I got a recurring question - "but what would you do with this?".
The honest answer? I'll probably keep it for a while on my desk and then either dismantle it or store it in the closet somewhere.
I know that this is a bit underwhelming, but the truth of the matter is that I do these projects for the sake of the project - not for some "goal". This is what makes this a hobby - and not a job.
But than again - maybe, like the folks at Lumon, I do have a hidden goal here. Only Kier knows.
FIN