
Recently, I’ve been struggling to get to work on time. It’s not a transportation problem - I use the public transport system to get to work, and I live in a place where I have plenty of options to go with.
The problem, rather, is me - I’m lazy, and it’s hard to get out of bed in the morning. I usually stall for time until the bus is almost here - which is when I frantically dress and run out the door to get on it in time. Not ideal.

What does get me out of bed in the end is seeing the numbers drop on my commute app - I know more or less how many minutes it takes me to get out of bed, get ready, and get to the bus stop on time. Therefore, I know when I have to leave my bed in order to make it on time.
However, as I’ve mentioned - I’m lazy. And when I wake up, I’m the most lazy of all.
Which is why I decided that having to check my phone in the morning to know how much time do I have is too much work.
Luckily for my lazy self, I’ve just recently discovered the joy of Raspberry Pi Zero and e-Paper screens. And it was when I was working on another side project (that I hope to write about as well, soon), that it occurred to me that these two are perfect match for me to use for solving my bus problem. So this is what I did!
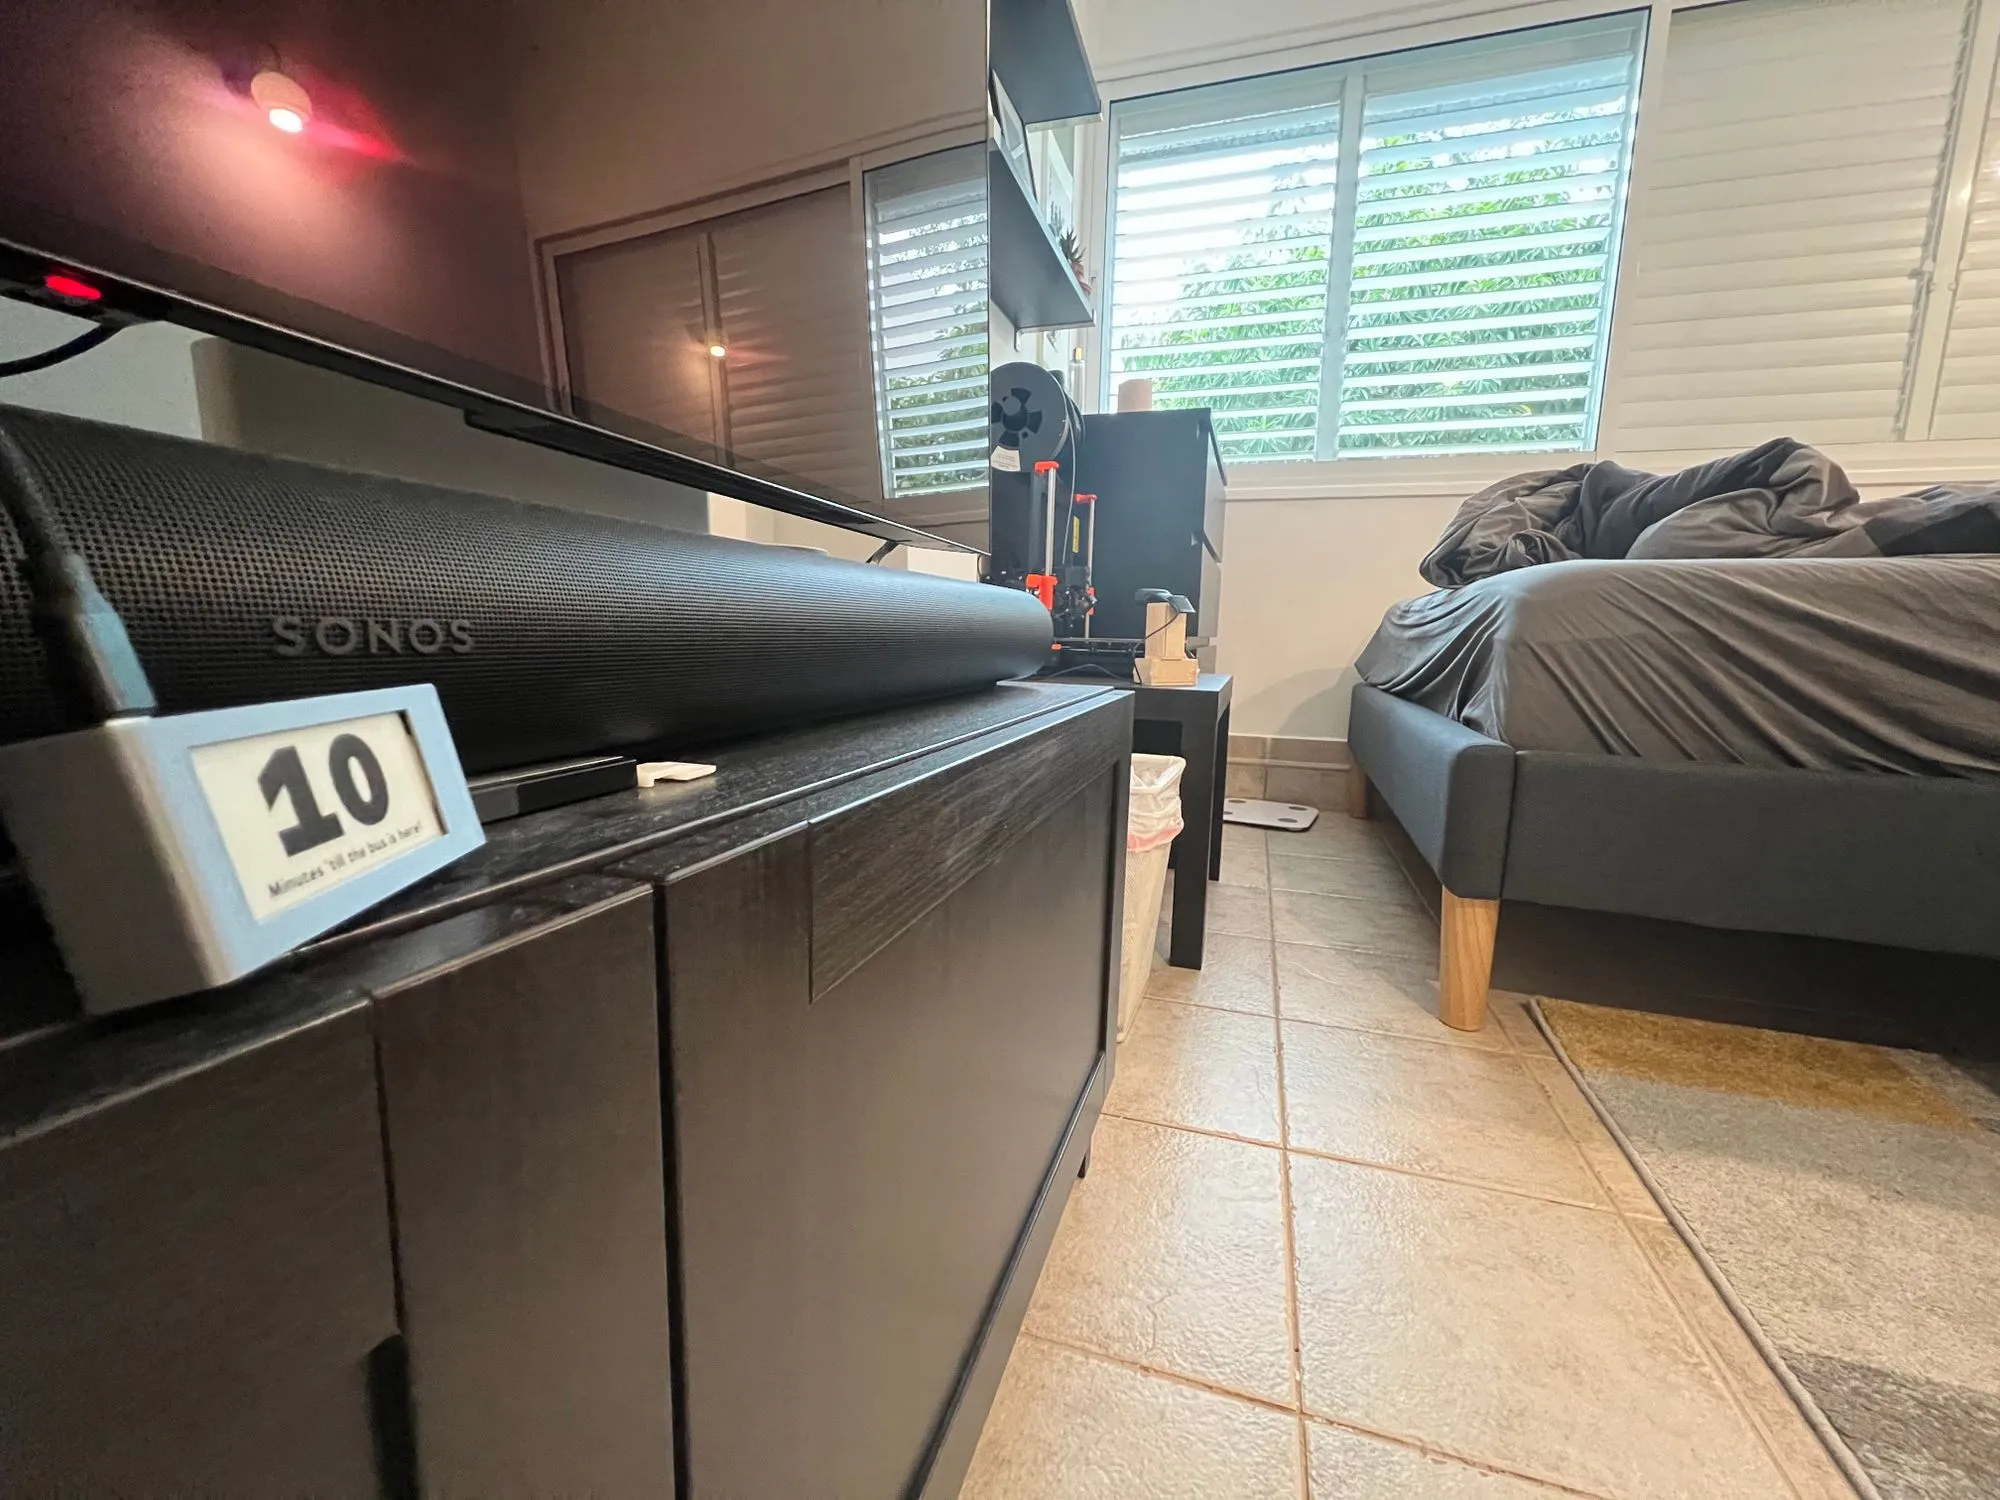
This project is named CuBus (Cube-Bus) and it’s goal is simple - allow me to see at a glance from my bed just how much time I have before the bus I usually take to work gets to the bus stop below my home.
Getting the bus status
The first thing I had to do was to get the information - when is the bus set to arrive? I’ve dabbled in the past with scraping information out of popular commute applications (such as Moovit, Efobus, and Google Maps) but have always found it to be an annoying solution to the problem - the app’s UI would constantly change, which meant that my crawler would have to be rewritten once every few months. This wouldn’t work.
So I thought about it and I figured - those apps have all got this information from somewhere, why won’t I find out where from, and get it myself - right from the source?
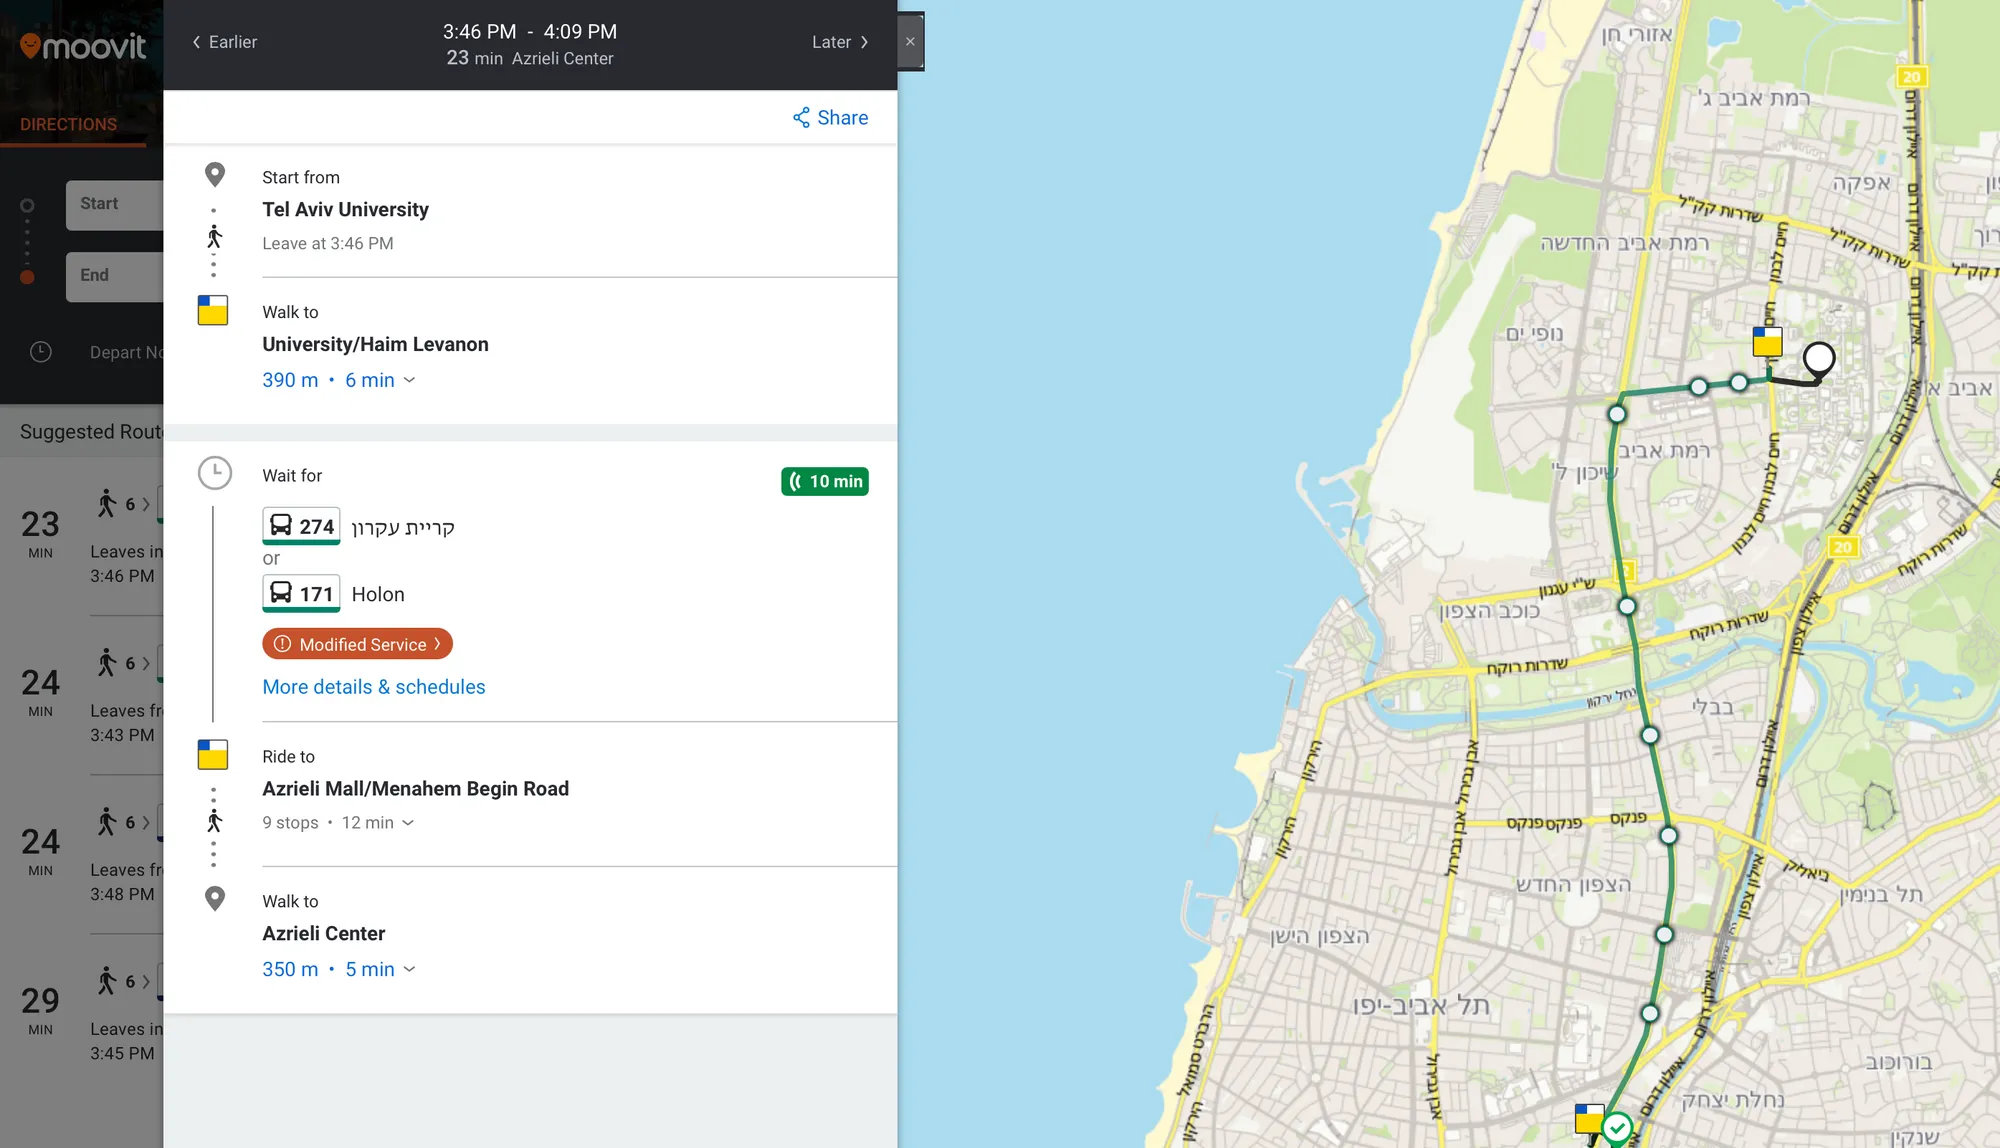
After a bit of Googling, I’ve discovered that as I’ve suspected, all these apps get their information from the same place - the Israeli Ministry of Transportation (surprise surprise, I know).
And I was in luck - the Ministry just happened to offer an API for developers to get this same information!
All I had to do was to submit a form, which is what I did. Within a couple of days I got an API key, and I could start working towards my solution.
The Server
After reading their API docs, it occurred to me that it would much nicer to have their API wrapped in a nice wrapper I could easily consume in my target application.
More so, once I’ve discovered that they require users to supply a fixed IP address to make queries from, meaning that I would need a server anyways.
I’ve decided to write the server in NodeJS using ExpressJS, because I’ve never used it and wanted to try something new rather than using Python as I usually do.
In addition, this was the first project I wrote using GitHub’s new AI-assistant plugin, and it was terrific - Copilot helped me write a lot of code in a very short amount of time, and I think I’lll use it much more in the future.
While the code is available in GitHub, it really all boils down to proxying the MoT API calls and wrapping it in an easier-to-use API:
function getTimeToStation(stationId, lineId) {
    return getRawStationInformation(stationId, function(json) {
        const stops = json["Siri"]["ServiceDelivery"]["StopMonitoringDelivery"][0]["MonitoredStopVisit"];
        var lineInfo = [];
        stops.forEach(element => {
            if (element.MonitoredVehicleJourney.PublishedLineName == lineId) {
                lineInfo.push({
                    tts: calculateTimeToStation(
                        element.RecordedAtTime,
                    element.MonitoredVehicleJourney.MonitoredCall.ExpectedArrivalTime
                    ),
                    raw: element
                });
            }
        });

        return JSON.stringify({
            id: stationId,
            lineId: lineId,
            results: lineInfo
        });
    });
}
The rest of the code is pretty much boilerplate needed to get the server to run:
/* Time to Station Endpoint */
app.get('/tts/:stationId/:lineName', (req, res) => {
  const stationId = req.params.stationId;
  const lineName = req.params.lineName;
  console.log(`[DEBUG] Got request: /tts/${stationId}/${lineName}`);
  publicTransport.getTimeToStation(stationId, lineName).then(data => {
      res.send(data);
  });
});
As I’ve said - nothing very interesting.
The Cube
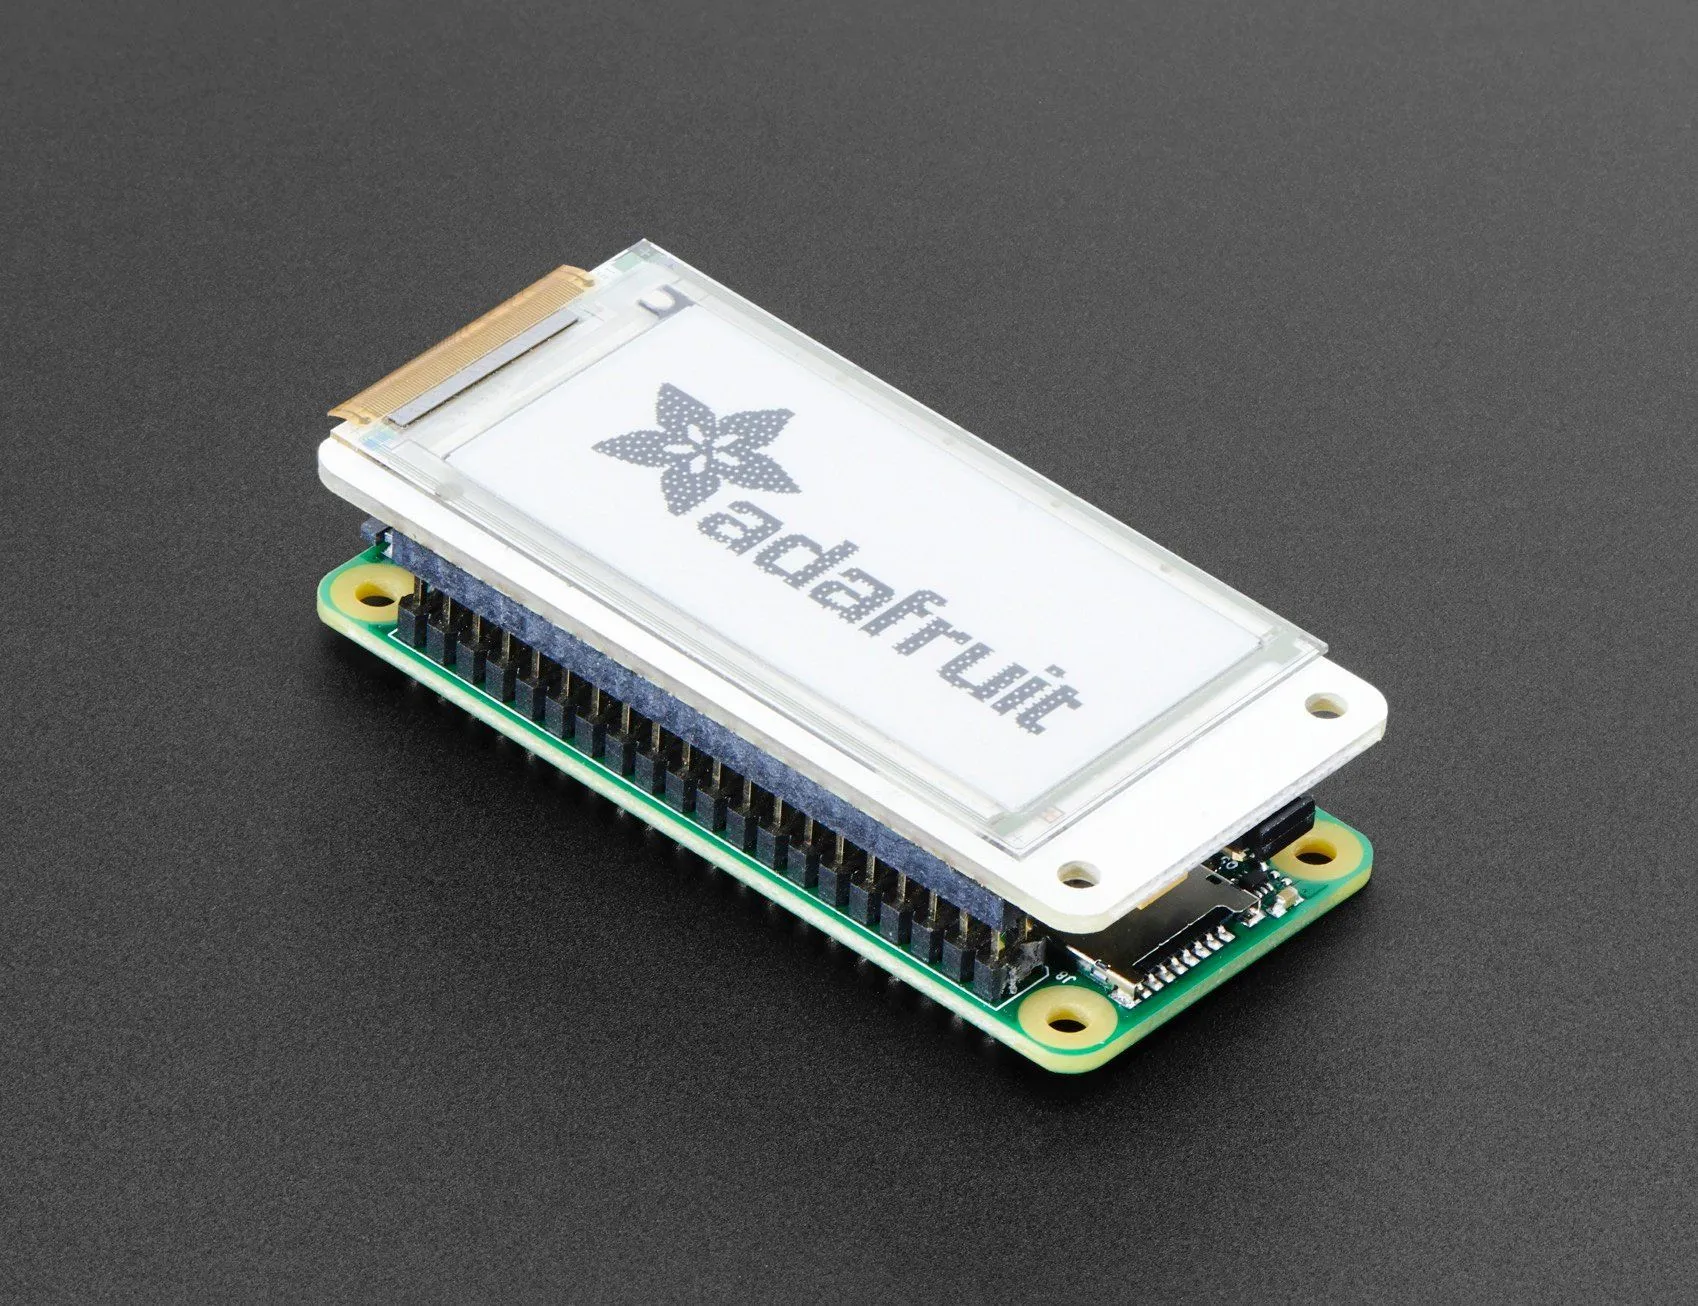
The “client side” is a Raspberry Pi Zero W (mine is WH, which includes pre-soldered GPIO pins, but using a W model and soldering pins will do just fine) running a simple python script which fetches the nearest bus.
The display is Waveshare’s EPD 2.13inch model, which hooks into the Pi’s GPIO ports without needing for any other connector:
The code is rather simple - I’ve used Waveshare’s python library to write a wrapper class for the screen, which includes partial refresh:
class PartialUpdateEPD(object):
def __init__(self, epd):
self.epd = epd
self.height = self.epd.height
self.width = self.epd.width
self.image = Image.new('1', (self.width, self.height), 255)
self.draw = ImageDraw.Draw(self.image)
self.epd.init(self.epd.FULL_UPDATE)
self.epd.displayPartBaseImage(self.epd.getbuffer(self.image))
epd.init(epd.PART_UPDATE)
def display(self, buffer):
self.epd.displayPartial(buffer)
def getbuffer(self, image):
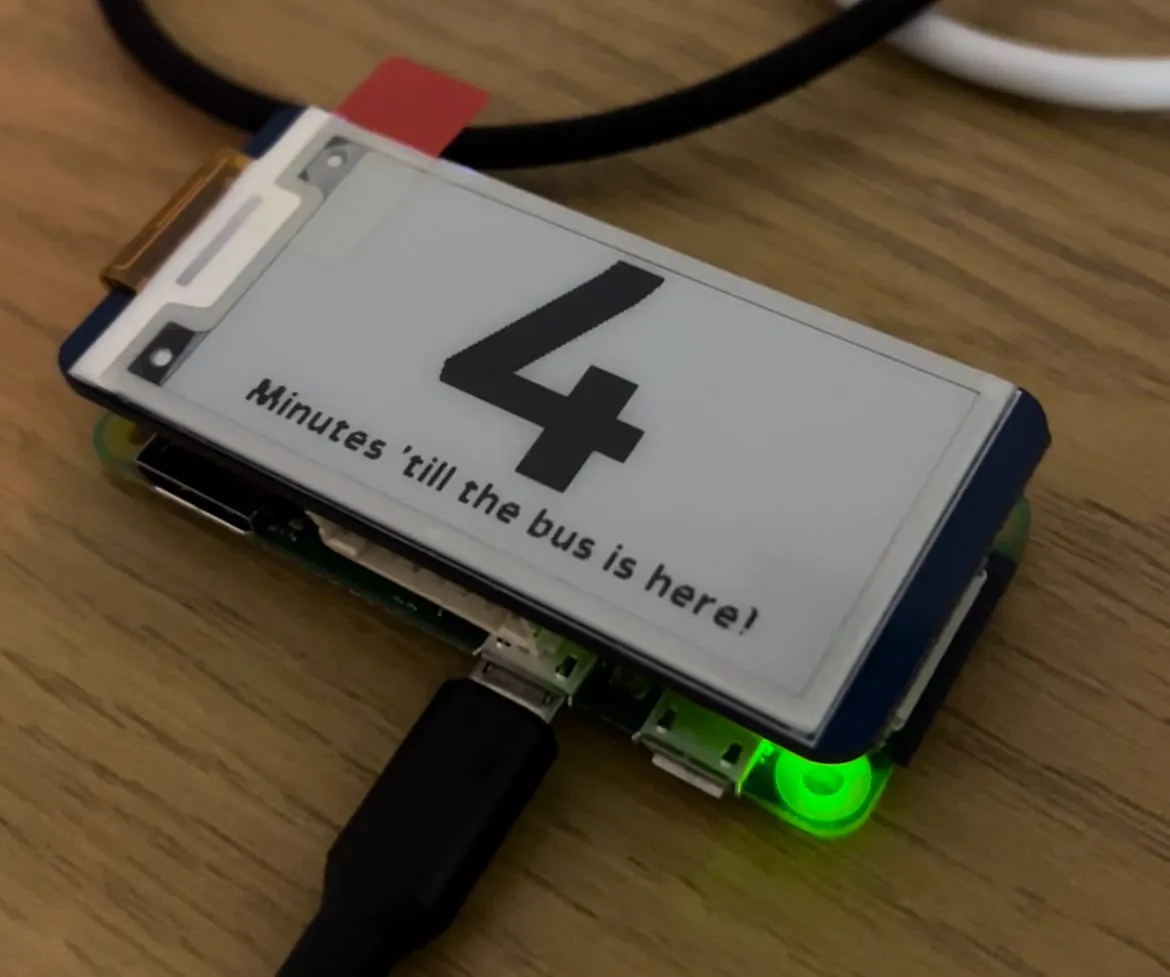
return self.epd.getbuffer(image.rotate(180))And the rest of the code is just fetching info from the server and displaying it:
def fetch_next_bus():
logging.info("Fetching next bus...")
response = requests.get(API_ENDPOINT)
if response.status_code == 200:
return response.json()
else:
return None
def display_tts(epd, tts_in_minutes):
font = ImageFont.truetype('Azeret.ttf', 120)
small_font = ImageFont.truetype('Alef.ttf', 15)
logging.info("Time to station: %d" % tts_in_minutes)
image = Image.new('1', (epd.height, epd.width), 255) # 255: clear the frame
draw = ImageDraw.Draw(image)
if tts_in_minutes < 10:
draw.text((85, -20), u'%d' % tts_in_minutes, font = font, fill = 0)
else:
draw.text((50, -20), u'%d' % tts_in_minutes, font = font, fill = 0)
draw.text((25, 100), u'Minutes \'till the bus is here!', font = small_font, fill = 0)
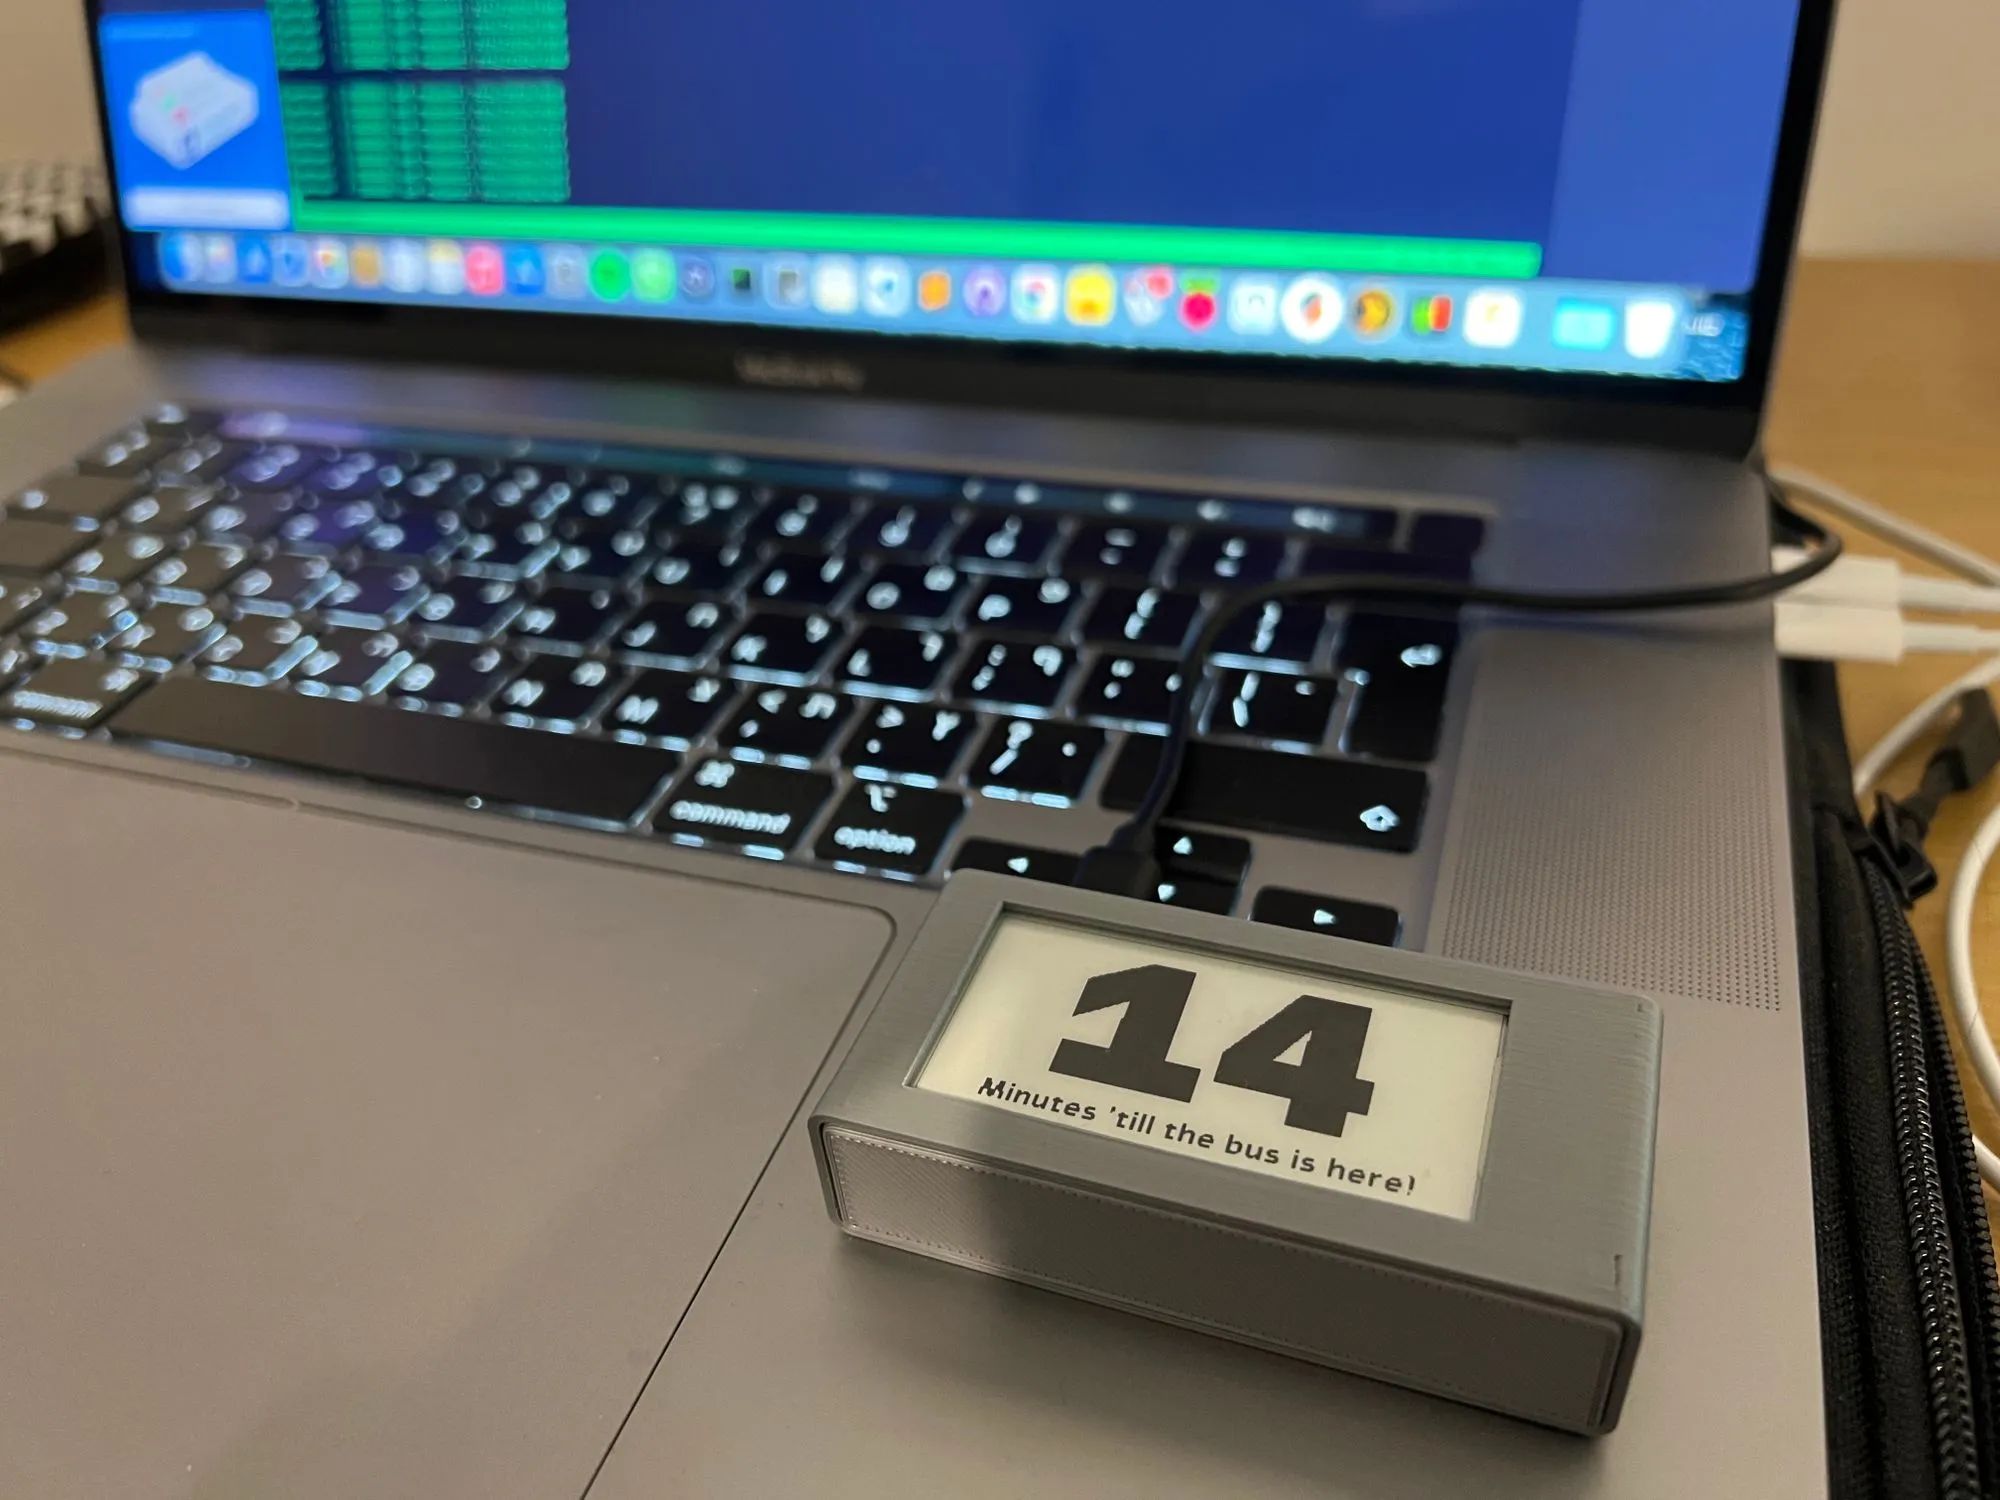
epd.display(epd.getbuffer(image))This is how it looks in practice:
The fonts I’ve used are Azeret and Alef, both are available on the Google Fonts page. The code is available here (note that you need to edit it to use your own server and to display the bus you want).
Case
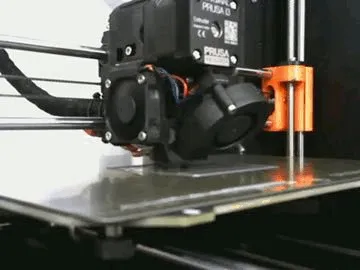
Finally, I’ve decided to put this little baby in a case and used the PWNAGOTCHI design to find a suitable design. I’ve printed it:
And got the final “product”:
Conclusion
After all this trouble, I’ve finally got my goal - I can see just how much time I’ve got left ‘till I have to leave for the bus, right out of my bed, and without reaching for my phone.
It’s is one of these useless-at-first-look projects, but it’s also one of these small-but-meaningful quality of life projects that make me happy to be a programmer - because now, every morning I get a small chance to remember just how much work I am willing to put into being lazy.
And isn’t that what’s being a programmer really about?
FIN